
If your Shopify store is starting to feel like a digital garage sale, you're not alone. The biggest surprise for many new store owners is that Shopify doesn't have a simple "subcategory" button. But don't worry, the solution is already at your fingertips. You just need to get creative with Shopify's built-in tools—specifically collections, tags, and menus—to build a smart, layered structure that guides your shoppers exactly where they want to go.
Why Your Shopify Store Needs Subcategories
A messy product catalog isn't just a small annoyance; it's a sales killer. Imagine a customer landing on your store, ready to spend, only to be faced with a massive "Apparel" or "Accessories" category. They're instantly overwhelmed. That confusion quickly turns into frustration, and they bounce, looking for a store that makes shopping easy.
For dropshippers, this problem gets amplified fast. Trying to manage huge, constantly changing product feeds from different suppliers can lead to absolute chaos without a solid plan.
Putting a clear subcategory system in place flips this entire experience on its head, turning a confusing mess into a smooth shopping journey. This is more than just a design tweak; it's a core business strategy.
Here’s what a well-organized store really gives you:
- A Better User Experience: Shoppers can intuitively move from a broad category like "Fitness" down to "Yoga Wear" and then pinpoint exactly what they need, like "Mats," in just a couple of clicks. It's a frictionless path from browsing to buying.
- Stronger SEO Performance: Subcategory pages are perfect for targeting specific, long-tail keywords that serious buyers use. Think "women's waterproof hiking boots" instead of just "boots." This helps you rank for more focused search terms and pull in highly qualified organic traffic.
- Higher Conversions and AOV: When products are easy to find and you can cross-promote related items within subcategories, you naturally encourage customers to explore more of your catalog. That often leads to a bigger cart and a higher average order value (AOV).
The apparel niche is a classic example of this in action. With over 185,000 fashion and apparel shops on Shopify, the competition is fierce. Stores without clear subcategories often see an average customer return rate of 27%, a huge number often chalked up to poor navigation.
This is a make-or-break issue for anyone dropshipping products from platforms like AliExpress. The sheer volume of items available can overwhelm both you and your customers. By skillfully using Shopify's collection and tagging features, you can build a logical hierarchy that brings order to the chaos.
Ultimately, a smart structure is one of the key dos and don'ts of building your Shopify store, playing a massive role in whether customers stick around. This kind of organization has been a cornerstone of Shopify’s own success, helping its Gross Merchandise Volume skyrocket from $10 billion in 2019 to a projected $292.3 billion in 2026. You can check out more stats on Shopify's massive growth and merchant statistics to see just how powerful a well-run store can be.
Building Your Foundation with Collections and Tags
The secret to creating subcategories in Shopify isn't some hidden feature you need to unlock. It's about mastering the tools you already have. The entire system is built on a powerful combination of Collections and Product Tags. Instead of a rigid folder structure, this approach gives you a flexible, dynamic way to group products, making your store incredibly easy for customers to browse.
Think of collections as your individual subcategory pages. If you run an online clothing boutique, you'd start with a broad collection like "Dresses." From there, you can create more specific collections—think "Summer Dresses," "Formal Gowns," or "Work Dresses"—each acting as a dedicated landing page for that particular group of products.
This whole process is about transforming a potentially cluttered store into a clean, organized hierarchy that guides customers straight to what they want.
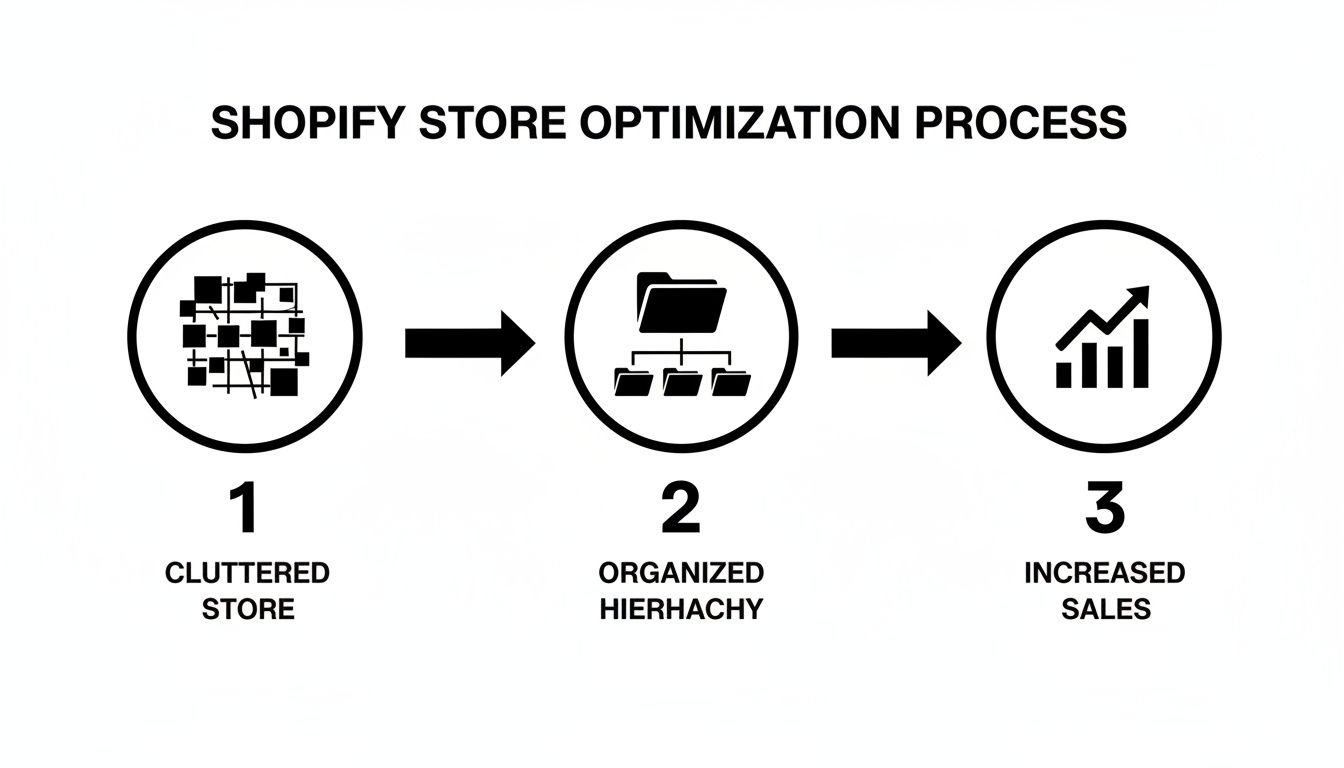
As you can see, organizing your products into a clear structure isn't just about looking tidy; it directly impacts your bottom line by turning confusion into sales.
Choosing Your Collection Type
Shopify gives you two distinct ways to populate these collections, and the right choice depends entirely on your catalog size and how you manage inventory.
Deciding between manual and automated collections is a crucial first step. Your choice will define how you manage your product groupings as your store grows.
Choosing Your Shopify Collection Type
| Feature | Manual Collections | Automated Collections |
|---|---|---|
| Best For | Small, curated selections like "New Arrivals" or "Staff Picks." | Large catalogs, creating subcategories, and rule-based sorting. |
| Product Adding | You individually select and add each product by hand. | Products are automatically added based on conditions you set (tags, price, type). |
| Maintenance | High. Requires constant manual updates as products are added or removed. | Low. "Set it and forget it" once the rules are established. |
| Control | Absolute. You have 100% control over every item in the collection. | Control is based on the precision of your rules. |
| Scalability | Poor. Becomes unmanageable for stores with hundreds of products. | Excellent. Scales effortlessly as your inventory expands. |
For most stores, especially those with a growing inventory, automated collections are the clear winner for building out a scalable subcategory structure.
The vast majority of successful stores lean heavily on automated collections. If you're a dropshipper managing hundreds of items, manually assigning each one to multiple subcategories just isn't realistic. Automation is your best friend here.
The Magic of a Consistent Tagging System
If automated collections are the engine, then product tags are the fuel. A well-planned, consistent tagging system is the absolute cornerstone of an organized Shopify store. Every product needs to be tagged with key attributes that you can use to filter it into various subcategories.
To really get the hang of this, it helps to understand the core mechanics, which this strategic guide to collections in Shopify covers well.
For instance, an electronics store selling headphones might use a tagging system like this:
type_over-earfeature_wirelessbrand_sony
With these tags in place, you could instantly create an automated collection for "Wireless Over-Ear Headphones" by setting two simple conditions: Product tag is equal to 'type_over-ear' AND Product tag is equal to 'feature_wireless'. If you want to go deeper, we've outlined more advanced strategies on how to properly use https://alisavepro.com/tags-on-shopify/.
Think about this: launching an AliExpress dropshipping store back in 2019 meant competing with just over 1 million merchants. Today, there are a staggering 4.82 million live Shopify stores. This kind of competition makes proper organization non-negotiable, especially in crowded niches like apparel, which accounts for nearly 800,000 stores. Using collections and tags to build a logical subcategory system is a proven method to manage large catalogs and keep shoppers from bouncing.
Crafting an Intuitive Nested Navigation Menu
So, you’ve put in the work and organized your products into clean collections. That's a huge step, but it doesn't mean much if your customers can't actually find anything. This is where your store's navigation comes in—it’s the bridge between all that behind-the-scenes organization and the real-world shopping experience.
The goal here is to mirror your collection hierarchy in a clear, multi-level menu that acts as your subcategory system. Fortunately, Shopify's navigation editor is incredibly user-friendly. Its drag-and-drop interface makes creating intuitive dropdowns a breeze.
Structuring Your Main Menu
Let’s get those new collections hooked up to your main menu. From your Shopify admin, head over to Online Store > Navigation and click on your main menu.
First, you'll add the parent category. Click "Add menu item," name it something broad like "Clothing," and link it to your primary "Clothing" collection. Easy enough.
Now, you'll repeat the process for your subcategory collections—think "Dresses," "Tops," and "Bottoms." Add each one as a new menu item. Here's the magic trick: once they're on the list, just click and drag each one slightly to the right, tucking it right under the main "Clothing" item. Shopify automatically turns this into a dropdown menu on your storefront. That’s it! You've just built your subcategory structure.
A bit of hard-won advice: keep it simple. It’s tempting to create endless nested menus, but anything more than three levels deep becomes a nightmare for shoppers, especially on mobile. Clarity trumps complexity every time.
Optimizing Menu Items for Shoppers and SEO
Naming your menu items is a delicate balance. You need labels that make immediate sense to a human shopper but are also packed with the right keywords for search engines. It's part user experience, part SEO science.
Forget generic labels like "Products." Instead, use descriptive names that people are actually typing into Google.
- Okay: "Women's Summer Dresses"
- A Bit Clunky: "Dresses – Summer"
- Best: "Summer Dresses" (It's concise, clear, and keyword-focused)
Think about what your customers would search for and use that natural language. A well-named menu not only helps people find what they want but also signals to search engines what your pages are about, giving you a nice little boost in rankings. While this structural foundation is key, don’t forget about the visuals. If you want to take your store's look and feel to the next level, you can learn how to customize Shopify themes to create a navigation experience that's truly unique to your brand.
4. Use Advanced Filtering for a Modern Shopping Experience
While nested menus are a solid way to build a classic subcategory structure, today’s best Shopify stores are leaning into something far more dynamic. With a modern Online Store 2.0 theme, you can set up faceted filtering, which lets customers essentially create their own subcategories in real-time. This transforms your collection pages from static displays into interactive discovery tools.
Think about it from a customer’s perspective. They land on your main "Dresses" collection. Instead of being forced down a path you’ve predefined, they see filters for "Style," "Color," and "Material." In a couple of clicks, they can instantly zero in on exactly what they want—a "Red, Summer, Maxi Dress." This isn't just a neat feature; it's a massive upgrade to the entire shopping journey.
How to Turn on and Set Up Collection Filters
Getting this up and running is surprisingly simple and is all done right inside your theme customizer.
From your Shopify admin, head over to Online Store > Themes, and click "Customize" on the theme you're using. Once the editor loads, just navigate to one of your collection page templates. You should see an option to enable filtering—this feature automatically pulls from your existing product data.
You can tell Shopify where to get the filter options from. The most common sources are:
- Product Tags: The tag system you're already using becomes a powerful filtering engine. A tag like
style_bohocan instantly create a "Boho" filter option. - Product Variants: Attributes like size and color are pulled in automatically, which is a huge time-saver.
- Metafields: For more specific criteria, you can create custom metafields for things like "Material" or "Brand" and then enable them as filter options.
Once it's on, you can tweak how it looks. You might prefer a vertical sidebar or a set of horizontal dropdowns at the top of the page. Fine-tuning the appearance is key to making it feel like a natural part of your store’s design.
Key Takeaway: When you put the sorting power directly into your customers' hands, you remove a ton of friction between browsing and buying. A better user experience almost always translates into a higher conversion rate.
This is a Game Changer for Dropshipping Catalogs
This filtering approach is an absolute lifesaver for dropshippers. You know the drill: you find a great product on a platform like AliExpress, but it comes with dozens, sometimes hundreds, of variants. A single t-shirt might have 10 colors and 5 sizes—that's 50 unique combinations. Creating a separate collection for every single one is completely out of the question.
With advanced filtering, you don’t have to. You can import the product with all its variant data intact. When a customer lands on the collection, they can easily filter by the exact size and color they want, making all 50 options instantly accessible. This solves one of the biggest organizational headaches in dropshipping and makes sure your products actually get seen.
And when you're dealing with all those variants, you need great media for each one. This is where a tool like AliSave Pro comes in handy. It lets you download all the variant images, customer review photos, and videos in one go. Pairing smart filtering with a full set of high-quality media is the secret sauce for a modern, high-converting store.
Optimizing Subcategories for SEO and Conversions
Alright, you've built the framework for your subcategories. That's a huge step, but now the real work begins. It’s time to transform those organized collection pages from simple product lists into powerful magnets for both search engine traffic and actual sales.
Just creating the pages won't cut it. You have to fine-tune every element to catch the eye of Google's crawlers and, more importantly, your customers.
This part is a careful mix of technical SEO and smart merchandising. You need to clearly signal to Google what your pages are all about while also convincing shoppers they've landed in exactly the right spot.
Fine-Tuning Your On-Page SEO
Think of every new subcategory collection page as a fresh opportunity to rank for specific, high-intent keywords. Don't let that potential go to waste. You'll want to go through and meticulously optimize the core on-page elements for each one.
Start with the URL handle. Shopify usually generates this automatically from your collection title, but it’s always worth a second look. Your goal is a URL that's short, clean, and packed with relevant keywords. For a collection of summer dresses, something like your-store.com/collections/womens-summer-dresses is infinitely better than a messy, auto-generated string of characters.
From there, turn your attention to these critical components:
- Page Title (SEO Title): This is what shows up in the browser tab and on Google's search results. Make it count. Craft a compelling title that includes your target keyword, like "Shop Women's Summer Dresses Online | Your Brand Name."
- Meta Description: This is the short snippet of text under your title on a search results page. While it doesn't directly influence your ranking, a well-written description can make a massive difference in your click-through rate. Mention things like free shipping, unique materials, or a special offer to entice people to click on your link instead of a competitor's.
Remember, the name of the game is targeting long-tail keywords. Trying to rank for a broad term like "dresses" is an uphill battle. But ranking for "bohemian floral maxi dresses"? That’s much more achievable and attracts shoppers who know exactly what they want and are ready to buy.
Boosting Conversions on Collection Pages
Once a shopper lands on your subcategory page, your job shifts from attracting to converting. SEO gets them through the door, but great merchandising is what makes them stay and buy.
Your collection description is the first chance you get to make an impression. Don't just stuff it with keywords. Use that space to tell a story, highlight what makes these products special, and guide the customer. The keywords should feel like a natural part of the narrative.
Beyond the text, how you arrange your products matters. A lot. Manually sort your collections to put your best-selling items right at the top. This simple move immediately showcases your most popular products, which builds social proof and grabs a customer's attention before they even think about scrolling.
Finally, especially in the world of dropshipping, trust is everything. Your subcategory pages need to look the part with high-quality visuals. This means professional-looking product photos for every single variant and—this is a big one—customer review photos. Nothing builds confidence like seeing real people using and loving your products. It's one of the most effective conversion tools you have.
An effective SEO strategy is a crucial piece of the puzzle. For a deeper dive into driving organic traffic, you can learn more about the Outrank SEO framework.
When It's Time for Apps or Custom Code
So, you've pushed Shopify's built-in collections and tags to their limits. This is a great problem to have—it means you're growing. But when you’re dealing with thousands of products or a really intricate catalog, the manual work can become a real drag on your time and resources.
This is the exact point where I tell clients to start looking at specialized Shopify apps for navigation and filtering. These aren't just simple add-ons; they're powerful tools designed to automate the heavy lifting, creating sophisticated filter trees and a much slicker browsing experience for your customers, all without you having to manually tag every single new product.
Of course, there’s a catch.
The two big things to weigh are cost and performance. Most of these high-powered navigation apps run on a monthly subscription, which adds to your overhead. Plus, every app you add injects more code into your theme, and that can sometimes slow your site down—a critical factor for SEO and conversions.
Now, if you’re a larger business, maybe on Shopify Plus or with a developer on hand, the conversation changes. This is where custom-coded solutions come into play. By tapping into metafields and custom theme development, you can build a filtering and subcategory system that's perfectly sculpted to your inventory.
It's the ultimate in flexibility and it's built for speed, but it does require a serious upfront investment. Still, knowing these options are on the table gives you a clear growth path as your store continues to expand.
Common Questions About Shopify Subcategories
As you start organizing your store, you'll inevitably run into a few common hurdles. I get these questions all the time, so let's clear up the most frequent challenges merchants face when setting up subcategories in Shopify.
Can I Create a Third Level of Subcategories in Shopify?
You absolutely can. For example, you could build out a navigation path like Clothing > Women's > Dresses > Summer Dresses. The process is the same: you just create a dedicated collection for "Summer Dresses" and then nest it under the "Dresses" menu item in your navigation settings.
But a little advice from experience: going deeper than three levels can get messy for your customers, especially on mobile. It's easy to create a navigation maze. Sticking to a three-level hierarchy is almost always the sweet spot for keeping things user-friendly while still offering plenty of detail.
Will Reorganizing My Store Hurt My SEO?
It’s a valid concern, and the answer is: it can, but if you do it right, it will be a massive long-term win. Well-structured subcategory collections are fantastic for targeting valuable long-tail keywords that serious buyers are searching for. The biggest pitfall is changing your collection URLs and forgetting to set up 301 redirects.
If you don't redirect your old URLs to the new ones, you'll end up with broken links and watch your search rankings tank. Any time you change a collection's "URL handle," make a beeline for Shopify's built-in URL redirect manager to protect all your hard-earned SEO progress.
What Is the Fastest Way to Manage Products in Many Subcategories?
This one's easy: automated collections based on product tags. It's not even a contest. Instead of dragging and dropping products one by one, you just create a smart tagging system. For instance, a single t-shirt tagged with shirt, cotton, and men can automatically show up in three different collections without you lifting a finger.
When you need to make changes across your catalog, just use Shopify's bulk editor or a specialized app to edit tags on hundreds of items at once. It's the only way to manage a large inventory without losing your mind.
Speaking of managing products, getting all your images and videos in order can be a huge time sink. I've found that AliSave Pro is a lifesaver here. It lets you download all the AliExpress product images, variant photos, and even media from customer reviews with just one click. You can grab the free extension and simplify your workflow at https://alisavepro.com.