

Getting Google Tag Manager on Shopify comes down to two main approaches: you can either get your hands dirty and manually edit your theme's Liquid files for ultimate control, or you can go the simpler route and use a dedicated Shopify app to handle the heavy lifting. This decision is more important than it sounds, as it’s your first step toward centralizing all your marketing tags and getting around Shopify's native tracking limitations—especially when it comes to the all-important checkout pages.
Why GTM Is a Game Changer for Shopify Stores
Let's be real—relying solely on Shopify's built-in analytics can feel like you're tracking with one hand tied behind your back. This is where Google Tag Manager (GTM) steps in, shifting from a "nice-to-have" to an absolute necessity for any serious e-commerce store. Instead of cluttering your theme with a dozen different tracking scripts—one for Meta, another for TikTok, one for Pinterest, and so on—GTM brings them all together under one roof.

This central dashboard is the real magic of GTM. It lets you manage, update, and deploy all your marketing and analytics tags without ever having to dig into your store's code again after the initial setup.
The need for this became painfully clear when Shopify locked down custom code on the checkout pages. That change sent a shockwave through the merchant community, forcing everyone to find new ways to capture crucial conversion data. Now, GTM and server-side tagging are the standard solutions. I've personally seen stores experience massive drops in their Google Ads conversion data, only to see it bounce back once a proper GTM implementation was in place.
Key Advantages for Your Store
Using GTM isn't just about convenience; it gives you a real competitive advantage.
- Centralized Tag Management: Ditch the code bloat in your
theme.liquidfile. Manage all your pixels—Meta, TikTok, Google Ads, you name it—from a single, organized platform. - Improved Site Speed: GTM loads scripts asynchronously. This means they don't hold up the rest of your page from loading, which can have a noticeable impact on your store's speed—a huge win for both user experience and SEO.
- Enhanced Data Accuracy: You get granular control over exactly when and how your tracking tags fire. This precision leads to much more reliable data, which means you can make business decisions with confidence.
- Future-Proof Your Analytics: As privacy laws and tracking technologies change (and they always do), GTM lets you adapt on the fly without having to call a developer to overhaul your theme code.
By mastering GTM, you're no longer just reacting to analytics data; you are actively architecting how that data is collected. It’s the difference between looking at a blurry photo and a high-resolution image of your customer journey.
If you're just starting out and need to get a handle on the basics, this practical guide on how to use Google Tag Manager is a great resource. It breaks down the core concepts and will give you the foundation you need to build a powerful tracking setup for your Shopify store.
Building Your Shopify DataLayer Foundation
A great Google Tag Manager setup hinges entirely on the quality of data it gets. That's where the dataLayer comes into play. It's the critical bridge between what happens on your Shopify store and what GTM can actually see and use.
Think of it as a translator. When a customer views a product or adds an item to their cart, the dataLayer organizes that action into a neat, structured format that GTM understands perfectly.
Without a solid dataLayer, GTM is basically flying blind. You can't track what you can't measure. By setting up a custom dataLayer, you're taking the reins and ensuring every key interaction—from product SKUs to prices and quantities—is captured accurately. This initial work saves you from a world of headaches down the road. It's also a core part of good customer data integration best practices, which is essential for any serious e-commerce business.
Getting Familiar with Shopify Liquid and Your Theme
To get this dataLayer built, we're going to roll up our sleeves and work with your Shopify theme's code. This means using Liquid, which is Shopify's own templating language. It’s what lets us grab dynamic store data—like product details from a product object or cart contents from the cart object—and feed it directly into our dataLayer script.
The main file we'll be editing is theme.liquid. This is the master template for your entire store, so any code placed here will load on every single page. For more complex tracking, you might need to dig into specific product templates or even create new snippets. If you're new to this, our guide on how to customize Shopify themes is a fantastic primer on theme architecture.
Shopify's official Liquid documentation is a lifesaver. I always have it open in a tab when I'm working on a project. It's your go-to resource for finding all the variables you can use to pull store data into your code.
Initializing the DataLayer in theme.liquid
First things first, we need to officially declare the dataLayer object. This is a tiny but absolutely crucial snippet of code. You need to place it as high up as possible in the <head> section of your theme.liquid file. The golden rule is to put it right before your main GTM container snippet.
Why the specific placement? It's all about timing. This ensures the dataLayer exists before the GTM script loads and tries to use it. Getting this wrong can lead to race conditions and tracking errors, so it's a step you can't afford to skip.
Here's the snippet you'll need:
window.dataLayer = window.dataLayer || [];This code is beautifully simple. It just checks if a dataLayer already exists on the page. If it does, great. If not, it creates a fresh, empty one. This little line is the foundation for everything else we're about to do.
Now that the foundation is laid, you're ready to start filling it with rich e-commerce data. We'll be adding more Liquid-powered scripts to capture page details, user information, and customer events next.
Tracking Key Ecommerce Events in GTM
Alright, now that your dataLayer is up and running, it's time for the fun part: capturing the user actions that actually drive your business. This is where using Google Tag Manager on Shopify really starts to pay off, letting you build a rich, detailed map of your customer's journey.
We’re going to focus on the big three e-commerce events. To do this, we'll need to set up a few essential tags, triggers, and variables inside your GTM container. Think of it as transforming clicks and scrolls into hard data you can actually use to make smarter marketing decisions and spot holes in your sales funnel.
Capturing Product Views with view_item
First up is the view_item event. Every time a potential customer clicks to view one of your products, you want to know about it. This is your clearest signal of which products are grabbing attention.
To get this working, you'll need to drop a small script into your product.liquid theme file (or whatever template your specific theme uses for product pages). This code snippet's job is to push an event into the dataLayer whenever a product page loads, bringing with it all the important details like the product’s name, ID, price, and variant.
Over in GTM, you’ll create a Custom Event Trigger that’s specifically listening for the event named view_item. Once you have that trigger, you can create a new tag for GA4 or Meta and tell it to fire only when that product view happens. Simple as that.
The flow of information looks something like this:
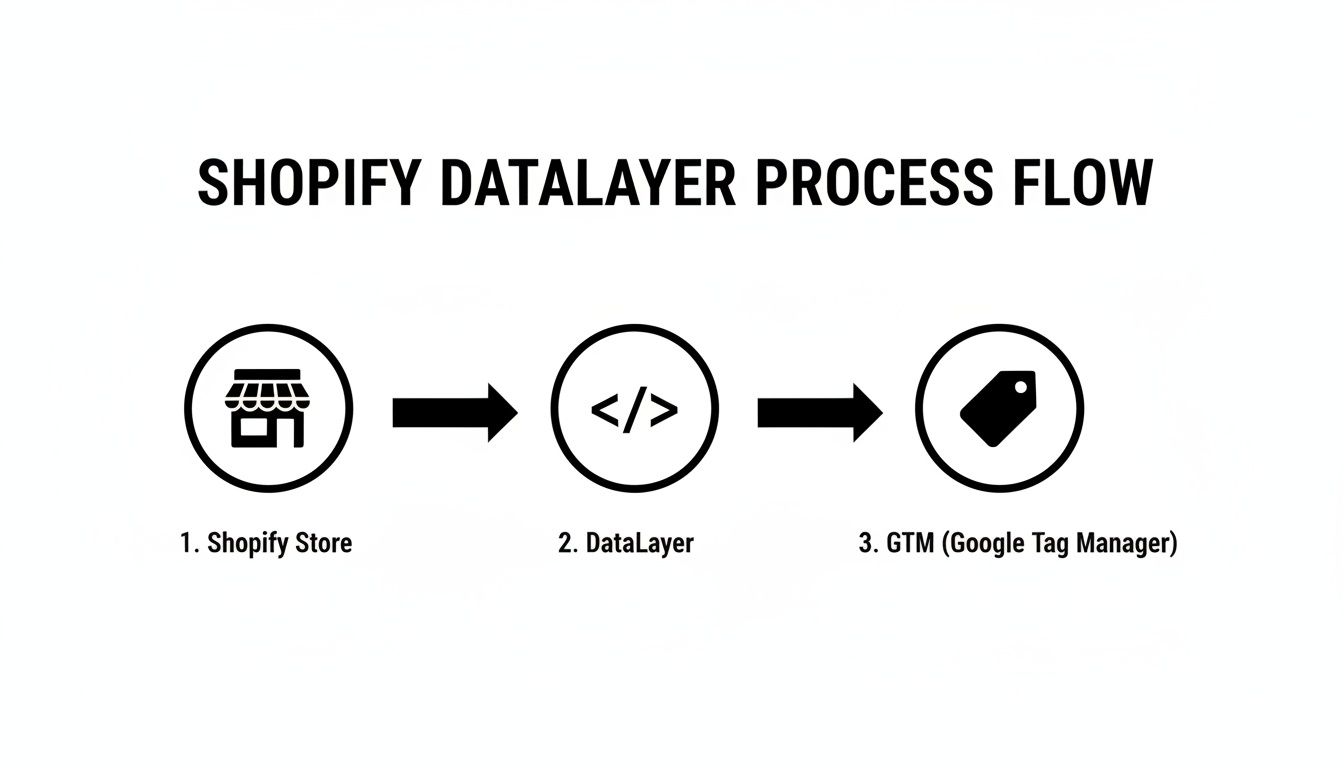
As you can see, the dataLayer acts as the critical middleman, translating on-site actions into a language your analytics and marketing tools can understand.
Tracking Add to Cart Actions
The add_to_cart event is a huge indicator of purchase intent. Capturing this one is a bit different because it's tied to a button click, not a page load. You'll need some JavaScript that actively listens for a click on your "Add to Cart" button. When it detects one, it pushes the add_to_cart event and all the relevant product info to the dataLayer.
The setup in GTM is almost identical to what we did for view_item. You'll configure a new Custom Event Trigger to listen for the add_to_cart event. Attach that trigger to your tags, and you'll be sending rich data to platforms like GA4, showing you exactly which products people are adding to their carts. This is absolute gold when you're trying to figure out how to improve ecommerce conversion rates.
Monitoring the All-Important Purchase Event
And now for the main event: the purchase. This is the one that directly ties your marketing efforts to revenue. You'll capture this on the Order Status page—what most people call the "Thank You" page. A script placed here will push a treasure trove of transaction data into the dataLayer, including the order ID, total value, tax, shipping, and a full list of the items purchased.
Don't underestimate the financial impact of getting this right. I've seen merchants restore massive amounts of attributed revenue just by migrating their purchase tracking correctly to GTM. For a store with a $100 average order value and a 1.6% conversion rate, undercounting conversions by just 10% could mean $16,000 in revenue disappears from your reports every single month.
Capturing these three events—
view_item,add_to_cart, andpurchase—provides a complete, foundational view of your sales funnel within GTM. It transforms your analytics from simple pageview counting into a powerful, event-driven measurement system that tells the full story of your customer's journey from discovery to purchase.
Connecting GA4 and Other Marketing Pixels
Alright, you've done the heavy lifting. Your dataLayer is built, and your key events are firing. Now for the payoff. This is where your GTM container truly shines, acting as a central hub to feed clean, consistent data to all your marketing and analytics platforms. The best part? You won't have to touch another line of Shopify theme code again for this stuff.

First up, and arguably the most important connection, is Google Analytics 4 (GA4). GTM and GA4 were practically made for each other, which makes this integration a breeze.
Integrating with Google Analytics 4
Getting your ecommerce data flowing into GA4 involves just two key tags inside your GTM container.
- The Google Tag: Think of this as the foundation. You'll create one main Google Tag (what used to be called the GA4 Configuration tag), pop in your GA4 Measurement ID, and tell it to fire on every single page. It's that simple. This tag handles loading all the necessary GA4 scripts and tracks your basic pageviews.
- GA4 Event Tags: For each of those ecommerce events we set up—like
view_item,add_to_cart, andpurchase—you'll create a dedicated GA4 Event Tag. In the tag settings, you just reference your main Google Tag, enter the event name, and connect it to the custom event trigger you already built.
Because we're using the standard GA4 event names and a well-structured dataLayer, GTM already knows how to package that information perfectly for GA4’s ecommerce reports. Once you publish the container, you can pop over to the DebugView in GA4 and watch the data roll in.
Expanding to Other Marketing Platforms
The real magic of using Google Tag Manager on Shopify becomes obvious the moment you need to add another tool, like the Meta (Facebook) Pixel or a TikTok Pixel. The process is almost identical.
Instead of jamming yet another script into your Shopify theme, you just add a new tag in GTM. The platform even has pre-built templates for most of the major marketing tools, which simplifies things tremendously.
Let's take the Meta Pixel as an example:
- Search the Community Template Gallery and add the official "Meta Pixel" tag.
- Drop your Pixel ID into the tag's configuration field.
- Reuse the exact same triggers you already built for GA4. Now, when your
add_to_carttrigger fires, it sends that event to both GA4 and Meta at the same time.
This approach is a game-changer for data consistency. Every platform gets its data from the exact same dataLayer event, which cuts down on the frustrating discrepancies you see when managing a bunch of separate, hardcoded scripts. That kind of consistency is crucial, especially when you're trying to figure out if your advertising on Facebook works for your store.
By running all your tracking tags through GTM, you create a single source of truth for your marketing data. This not only makes your life easier but also boosts your site's performance by reducing the number of scripts loading directly on your storefront. Your marketing team can add, test, or update pixels on their own, making your whole operation faster and more data-driven.
Debugging Your GTM Setup and Exploring Server-Side GTM
Getting your tags implemented is only half the job. The real test is making sure everything is firing accurately. After you’ve set up your tags and triggers for Google Tag Manager on Shopify, it's time to put on your detective hat and validate your work. Thankfully, GTM gives you the tools you need to confirm every bit of data is being captured exactly as it should be.
Your go-to tool for this is GTM's Preview mode. It’s brilliant. When you enable it, a debug window connects directly to your Shopify store, giving you a live feed of what’s happening behind the scenes. You can see which tags fired when a page loaded, what data got pushed to the dataLayer when someone clicked "Add to Cart," and even figure out why a particular trigger didn't fire when you expected it to.
Troubleshooting a Common Scenario
Let's walk through a classic situation: you've set up an add_to_cart event, but the data isn't appearing in your analytics. What's the first move?
- Jump into Preview Mode: Fire it up, navigate to a product page on your store, and actually click the "Add to Cart" button.
- Watch the Event Stream: In the debug window's left-hand panel, you should see a timeline of events. Look for
add_to_cart. Did it show up? - Inspect the DataLayer: If the event is there, click on it and switch to the "Data Layer" tab. This is where you check if the product info—name, price, SKU—is present and formatted correctly. I’ve seen countless tags fail because of a misplaced comma or a simple typo in a variable name.
This systematic process lets you find the root of the problem, whether it's a trigger condition that's off, an incorrect variable, or a hiccup in the dataLayer push itself.
The Next Frontier: Server-Side GTM
Once you've gotten comfortable with client-side tracking, the next logical step for any serious Shopify store is to explore Server-Side GTM. Instead of sending tracking data straight from a user's browser to platforms like Google Analytics or Meta, the data is first routed to your own secure server container. From there, your server forwards the information to your analytics and marketing partners.
This is a huge deal in a world that’s becoming more focused on privacy and data accuracy. By moving tag execution off the browser, you get way more control and can seriously reduce the impact of ad-blockers and browser privacy features like ITP.
Server-side tagging isn't just a technical upgrade; it's a strategic move to future-proof your analytics. It enhances data quality, improves site performance by reducing client-side scripts, and provides a more robust foundation for measurement in the long term.
The results speak for themselves. Merchants who migrate to server-side GTM often report a 15–40% reduction in blocked events and a significant improvement in how many conversion events are successfully delivered. Why? Because requests from your own server are far less likely to be flagged by browser extensions. This ensures more of your most valuable data actually makes it to its destination. For a closer look at the data, you can check out the practical outcomes of server-side tagging discussed by experts in the field.
Common Questions About GTM on Shopify
When you start digging into a Google Tag Manager on Shopify setup, a few key questions always seem to pop up. Trust me, getting these sorted out upfront will save you a ton of headaches later and make sure your tracking is solid from day one. Let's walk through the big ones I hear all the time.
The absolute most common point of confusion? Tracking the full checkout funnel. It’s a constant question, and the answer is a bit of a "yes, but…" situation.
Can I Install GTM on Shopify Checkout Pages?
Simply put, you can't drop your GTM scripts onto the standard Shopify checkout pages. Shopify locks this part of the store down tight for security reasons, meaning the checkout.liquid file is off-limits unless you're a Shopify Plus merchant. And even for Plus stores, that access is being deprecated.
So, what's the workaround? The officially blessed and most reliable method is a two-pronged attack:
- For the Checkout Steps: You'll want to use Shopify's own Google & YouTube app. It's built to handle those intermediate events like
begin_checkoutandadd_payment_infoin a way that plays nice with Shopify's ecosystem. - For the Final Purchase: This is where GTM comes back into play. You can (and should) place your GTM container on the Order Status page—what most of us call the "Thank You" page. This is the perfect spot to capture that all-important
purchaseevent and all its juicy data.
This hybrid setup gives you the best of both worlds. You get the power of GTM for everything on your main site and after the sale, while letting the native integration handle the tricky in-between steps.
Should I Use a Shopify App or a Manual Install?
This is the classic "control vs. convenience" debate. Going the manual route by editing your theme.liquid file gives you total control. If you're comfortable with code and want to know exactly how everything is wired up, this is your path.
On the flip side, apps like Elevar or Analyzify are lifesavers. They automate the heavy lifting of creating a rich, detailed dataLayer. This can slash your development time and sidestep the potential for human error, making them a fantastic option if you need a robust, low-code solution.
It really boils down to your technical skill and resources. A manual install gives you ultimate control, but a dedicated app delivers speed and reliability, especially when you need a complex dataLayer.
Will GTM Slow Down My Shopify Store?
This is a valid concern, but if you do it right, GTM shouldn't hurt your site speed. The main GTM script loads asynchronously, which is a fancy way of saying it doesn't stop the rest of your page from loading.
In fact, it can often improve site performance. By moving all your separate tracking scripts for Meta, TikTok, Pinterest, and others into GTM, you're consolidating them into a single request.
The secret is good tag hygiene. Don't go wild firing dozens of tags on every page. Be strategic, only load what's essential for your business, and you'll keep your store fast and your user experience smooth.
Ready to take the first step in streamlining your product workflow? With AliSave Pro, you can download all AliExpress product images and videos in a single click, preparing your store's media assets in seconds. Get started for free today.