
Uploading a picture to Pinterest is deceptively simple. You just click the 'Create' button, choose 'Create Pin', drop in your image, and fill out the details like a title, description, and product link. But that simple action does so much more—it turns a static photo into a dynamic sales tool.
Why Pinterest Is a Visual Sales Channel, Not Just a Social Network
It’s time to completely rethink what Pinterest is. Forget about it being a place where people just scroll through updates from friends. Pinterest is a giant visual search engine. Its users, or "Pinners," show up with a mission: to find new ideas, plan for the future, and discover products they want to buy. For anyone in e-commerce, that distinction is everything.
Every single time you upload an image, you're not just posting content. You're strategically placing your products inside a massive, living catalog where people are actively looking for things to buy. This creates an environment buzzing with high-intent users, which is perfect for online stores and dropshippers.
Tapping Into a Growth-Focused Audience
The audience on Pinterest isn't just engaged; it's also growing like crazy. The platform has skyrocketed to 553 million monthly active users, which is a massive 11% jump from the previous year. This growth spurt makes it a prime location for sellers who want to get their products seen.
What’s really interesting for sellers is that 70% of Pinterest users are female. This is a powerful demographic that drives a huge number of purchasing decisions in hot niches like fashion, home décor, and lifestyle products. You can dig deeper into these Pinterest statistics to see what they mean for your store.
This user behavior opens up a huge opportunity. Your product image isn't just another post—it’s the answer to a Pinner's search. Think about it: someone planning a living room remodel might search for "modern farmhouse decor." If your Pin pops up, you've just met a customer at the exact moment they're ready to be inspired.
Pinterest is less about who you are and more about what you're going to do. The platform’s users are planners, actively seeking inspiration for their next purchase, making it an invaluable channel for product discovery.
From Inspiration to Purchase
Getting this user mindset is the key to unlocking Pinterest's potential. The path from discovery to purchase is incredibly direct and visual. A single, well-made Pin can take someone from a casual search straight to your product page, credit card in hand.
This is why learning how to upload images correctly isn't just a technical task; it's a fundamental part of your sales strategy. Every Pin you create contributes directly to your bottom line by:
- Increasing Product Visibility: You get in front of an audience that's already looking for what you sell.
- Driving Higher Quality Traffic: The visitors who click through have already shown genuine interest in your niche.
- Building Long-Term Asset Value: Unlike a social media post that disappears in a day, Pins have a very long shelf life and can drive traffic for months, or even years, to come.
Getting Your Product Images Ready for Pinterest
Before you even touch the upload button on Pinterest, the real work has already started. A killer Pin isn’t just about the upload process; it's born from a high-quality, eye-catching visual that makes someone stop scrolling. For anyone in e-commerce, and especially for dropshippers, this means you need an efficient way to get your hands on a variety of professional-looking product photos.
Let's be honest: manually saving every single product shot, color variant, and customer review photo is a soul-crushing, repetitive task. It's a massive time sink that kills your productivity. This is where you can get a serious edge.
Speed Up Your Image Sourcing
There are tools out there built specifically to make this part of the job easier. Take a browser extension like AliSave Pro, for example. It lets you download all the media from an AliExpress product page—we’re talking high-res photos, variant images, and even videos—with a single click.
This simple step saves you from the tedious right-click-and-save dance. Instead of spending hours hunting for images, you'll have an organized library of assets ready to go. That frees you up to focus on the creative part: crafting Pins that actually convert.
This isn't just about saving time, either. It gives you a wealth of content to work with. You can create multiple, unique Pins for just one product. Showcase different colors, zoom in on key features, or use customer photos to build trust—all from that one initial download.
Nail the Technical Details
Once your image library is stocked, it’s time for prep. Pinterest is a visual platform, first and foremost, so the technical side of your images directly impacts how well they perform. The goal is simple: make your images look incredible while ensuring they load fast and are formatted for the platform.
Here are the essentials you absolutely can't skip:
- Get the Aspect Ratio Right: Pinterest is all about vertical. The sweet spot is a 2:3 aspect ratio, which translates to dimensions like 1000 x 1500 pixels. This format dominates the screen on mobile phones, making your Pin impossible to ignore.
- Pick the Best File Type: For standard product photos, JPEG is your best bet. It strikes a fantastic balance between image quality and file size. If your image has text overlays, sharp graphics, or a logo, switch to PNG to keep those lines perfectly crisp.
- Never Compromise on Quality: Always, always start with the highest resolution images you can find. A blurry, pixelated Pin screams unprofessionalism and gets scrolled past in a heartbeat. Your photos need to be sharp, well-lit, and show off your product clearly.
Think of it this way: every image you pin is a direct reflection of your brand. Taking a few extra minutes to prep your visuals sends a signal of quality and care to potential customers. That small effort makes them far more likely to click through and buy.
Following these steps gets your images technically ready for prime time. If you want to get into the weeds of file compression and optimization, our guide on how to optimize images for the web is a great next step. Proper preparation turns a simple picture into a powerful marketing tool.
A Practical Guide to Uploading Pins That Convert
Once you have your images prepped and ready, it's time to get them onto Pinterest. Whether you’re at your desk or using your phone, the process is pretty simple. But don't just rush through it—every single field you fill out is a chance to turn that image into a real sales driver.
Your starting point is always the 'Create' button on your Pinterest profile. Click that, then select 'Create Pin,' and you'll land on the upload screen. This is your control center for bringing a product to life on the platform.
Uploading from Your Desktop
The desktop view gives you the most screen real estate, which I find is perfect for when you really want to focus on the details. On the left, you’ll see a big area where you can drag and drop an image or just click to browse files on your computer.
As soon as your image pops up, all the important work happens on the right-hand side. Don't think of these fields as just boxes to tick. Each one is a tool to help your Pin get seen by more people.
Here's what you'll be working with:
- Board Selection: Use the dropdown to pick the most relevant board for your Pin. An account with specific, keyword-rich boards is your secret weapon for getting discovered.
- Title: You've got 100 characters here, so make them count. Write something compelling that includes your main keyword and makes people want to click.
- Description: This is where you can elaborate. With up to 500 characters, you have space to tell a story about your product. Weave in your keywords naturally while talking about the benefits and how it can be used.
- Alt Text: This is a non-negotiable step for both accessibility and SEO. Just describe exactly what's in the picture. It helps visually impaired users and gives the Pinterest algorithm more context.
- Destination Link: Paste the direct URL to your product page here. Always, always double-check this link to make sure it works and goes to the right place.
Uploading from the Mobile App
For those times when you're out and about, uploading from your phone is a lifesaver. The process is just as powerful, even if the layout is more compact. Just tap the plus (+) icon at the bottom of your screen and choose 'Pin.'
After you select an image from your camera roll, you'll see prompts for the same crucial info: Title, Description, Link, and Alt Text. The mobile app is fantastic for keeping your posting schedule consistent, no matter where you are.
If you often find yourself grabbing images on your phone for later use, our guide on how to download images from websites has some great tips to make that workflow even smoother.
It's a common misconception that Pinterest prefers Pins from one device over another. The truth is, it doesn't care. What matters is the quality of your Pin. A thoughtfully crafted Pin from your phone will always beat a sloppy one from a desktop.
Key Differences in Pinterest Desktop vs Mobile Uploading
While you can get the job done on either device, the experience is a little different. Knowing the small distinctions can help you pick the right tool for the task at hand. Here’s a quick look at how they stack up.
| Feature | Desktop Experience | Mobile App Experience |
|---|---|---|
| Workspace | An expansive, side-by-side view where you can see everything at once. Great for detailed work. | A more compact, step-by-step process that guides you through each field sequentially. |
| Image Handling | Ideal for uploading high-resolution images from organized folders on your computer. | Super convenient for uploading photos you've just taken or saved to your camera roll. |
| Drafting | Much easier to manage and switch between multiple drafts at the same time. | Simple enough to save a single draft, but not as easy to juggle several at once. |
| Scheduling | Full access to Pinterest’s native scheduler for planning your content calendar in advance. | Scheduling is also available, so you can easily plan Pins while you're away from your desk. |
Ultimately, both paths lead to the same result. I tend to do my bulk, detailed work on a desktop but rely on the mobile app for spontaneous posts and keeping my schedule full when I’m not at my computer.
Optimizing Your Pins to Drive Traffic and Sales
Knowing how to upload a picture is just the starting line. The real magic, the part that drives traffic and turns browsers into buyers, happens when you optimize every single element of your Pin. Simply throwing an image up isn't enough; you have to transform it into a powerful marketing asset.
This is where you graduate from simply being on Pinterest to actually succeeding on the platform. Your description, link, alt text—each piece works together to tell Pinterest's algorithm what your Pin is about, helping it reach the right people.
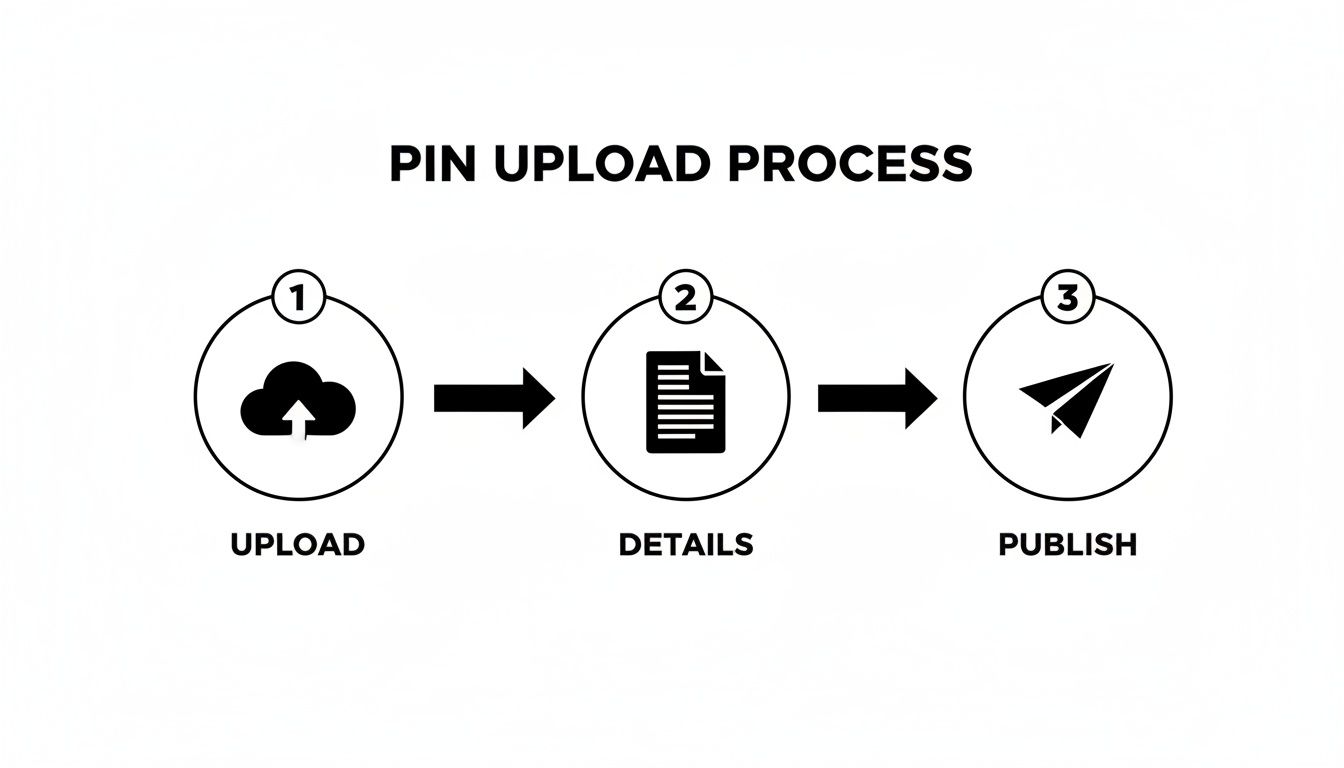
While the process looks simple, that middle "Details" phase is where all the strategic work happens. Let's break it down.
Crafting Descriptions That Attract Buyers
Think of your Pin description as your sales pitch. You get up to 500 characters to not only describe what you're selling but also to show someone how it can improve their life or solve a problem. The key is to think like your ideal customer. What words would they actually type into the search bar?
Don't just write "Blue ceramic mug." That’s boring and misses a huge opportunity.
Instead, try something that tells a story and is packed with keywords: "Start your morning with this beautiful handcrafted blue ceramic mug. Its large, comfortable handle and unique speckled glaze make it the perfect coffee cup for your modern farmhouse kitchen decor." See the difference? We’ve naturally included terms like "handcrafted," "coffee cup," and "farmhouse kitchen decor."
Making Every Click Count with Destination Links
For any e-commerce business, the destination link is arguably the most important part of the Pin. It’s the bridge that takes a Pinner from inspiration to purchase.
Always, always link directly to the specific product page. Sending someone to your homepage after they clicked on a Pin for a particular dress is a recipe for frustration and a lost sale. They expect to land on that dress's page, ready to check sizes and add it to their cart.
To get even smarter with your data, add UTM parameters to your links. This is a simple bit of text added to the end of your URL that lets you see exactly how much traffic and revenue your Pins are generating in Google Analytics. A link might look like this:
yourstore.com/product-url?utm_source=pinterest&utm_medium=social&utm_campaign=spring-collection
This small step provides incredibly powerful data to help you figure out what’s working.
A Pin without a direct, working link is a dead end for a potential customer. It creates a frustrating user experience and represents a completely lost sales opportunity for your business.
The Overlooked Power of Alt Text
Most people skip right over alt text, but it serves two huge functions. First, it makes your Pins accessible to visually impaired users who use screen readers. Second, it gives Pinterest's algorithm another powerful clue about what’s in your image, which is fantastic for SEO.
Your alt text should be descriptive but concise. For an image of a styled dining table, you might write: "A rustic oak dining table with white ceramic plates, linen napkins, and a centerpiece of eucalyptus leaves." This gives both people and the platform a perfect understanding of the visual.
For dropshippers, this level of optimization is a game-changer. Research shows Pinterest users are 7 times more likely to say the platform influenced their buying decisions. When 89% of US users are on the platform specifically for purchase inspiration, a well-optimized Pin puts your product directly in front of a highly motivated audience.
To take your strategy a step further, consider using social media scheduling tools to plan your content ahead. And don't forget to post when your audience is most active; knowing the best times to post on Pinterest can give your optimized Pins the initial boost they need to go viral.
What to Do When Pinterest Uploads Go Wrong
Even the most seasoned Pinterest pros run into trouble now and then. You’ve got your workflow down, but suddenly a Pin looks blurry, a link is dead on arrival, or an upload just vanishes into thin air. It’s frustrating, but don't worry—most of these hiccups are common and have surprisingly simple fixes.
More often than not, a blurry or pixelated Pin is the result of a low-quality image or incorrect sizing. Pinterest is a visual platform, so starting with a fuzzy image is a non-starter. To keep your Pins looking sharp and professional, always use high-resolution source images and stick to that sweet spot 2:3 aspect ratio (think 1000 x 1500 pixels). This ensures your picture looks fantastic, whether someone is viewing it on a phone or a desktop.
Another classic mistake is a broken destination link. This is a bigger deal than it seems; it sends your potential customers to a dead end, which is a terrible user experience, and it can even get your Pin flagged by Pinterest. Always, always double-check your URL before you hit publish. Make sure it points to the right product page and doesn't have any sneaky typos.
Quick Fixes for Common Upload Headaches
Sometimes, the issue isn't with your image or your link but with a temporary technical glitch on Pinterest's end. If your Pin just won't publish or refuses to show up on your board, take a breath before you start over. The platform occasionally has delays or network hiccups.
Instead of immediately re-uploading and risking a duplicate Pin, try these quick troubleshooting steps first:
- Hit Refresh: It sounds too simple, but a quick browser refresh is often all it takes to clear up temporary loading errors.
- Check the File Type: Make sure your image is a format Pinterest likes. Stick to standard types like .PNG or .JPG to avoid any "unsupported file" errors.
- Just Wait a Minute: Seriously. Sometimes there’s a small lag between when you publish a Pin and when it actually appears live on the platform. Give it a few minutes before you assume something is broken.
The whole point is to spend your time selling, not wrestling with tech issues. By getting familiar with these common problems, you can diagnose and fix them in seconds, keeping your content strategy on track and maintaining a polished, professional presence on the platform.
Your Pinterest E-Commerce Questions, Answered
Even when you have a good game plan, questions always come up when you start using Pinterest to sell. Nailing the small details can seriously impact how well you do and how much time you spend.
Let's dive into some of the most common questions I hear from fellow e-commerce sellers.
How Many Pictures Should I Post on Pinterest Each Day?
There's no single magic number here, but I can tell you this from experience: consistency always beats volume.
A good target for an online store is to share anywhere from 3 to 10 new, unique Pins a day. Now, that doesn't mean you need to feature ten different products every single day. That would be exhausting!
Think creatively. You can easily make multiple unique Pins for just one product. Try using different product photos, creating a simple collage, or adding a text overlay that highlights a key benefit. Short video Pins are also gold. This strategy helps you reach different people without burning yourself out on content creation.
Can I Upload a Picture to Pinterest Without a Website Link?
You can, but you absolutely shouldn't. For an e-commerce brand, posting a Pin without a destination link is a huge missed opportunity. The whole point is to get people who are interested in your product off of Pinterest and onto your product page so they can buy it.
A Pin without a link is like a beautiful storefront with no door. It looks great, but it stops the customer's journey cold.
Always, always add a direct link to the specific product page. If you're focusing more on brand awareness, you could link to a blog post or a category page, but every single Pin needs a purpose and a place to go.
What Are the Best Image Dimensions for Pinterest Pins?
Stick to a 2:3 aspect ratio. It’s the sweet spot.
In terms of pixels, that means something like 1000 x 1500 pixels is perfect. This tall, vertical format is a non-negotiable because it takes up more space on a phone screen, grabbing attention as people scroll through their feeds.
You can upload square images, but they just don't perform as well. Also, steer clear of those super-long "giraffe" Pins. Pinterest tends to cut them off in the feed, which means your key message or call to action might get hidden. The same 2:3 ratio works best for Video Pins, too. Keeping your images in this format ensures they look sharp and professional.
Optimizing your Pins is the first step. To make sure that traffic converts into sales, it's crucial to have a seamless purchase process. You can learn more by exploring these ecommerce checkout best practices.
Tired of saving product images one by one? With AliSave Pro, you can grab all the high-resolution photos, variants, and videos from any AliExpress page with just one click. It's a massive time-saver that lets you create better Pins, faster. Get started for free at https://alisavepro.com.