The perfect Instagram Reels format is a 9:16 aspect ratio with a crisp 1080×1920 pixel resolution. For the cleanest upload, your video file should be an MP4 using the H.264 codec, with AAC audio and a smooth 30 frames per second (FPS).
Nailing these technical specs from the start is the secret to making your content look professional and sidestepping Instagram's notorious compression, which can ruin video quality.
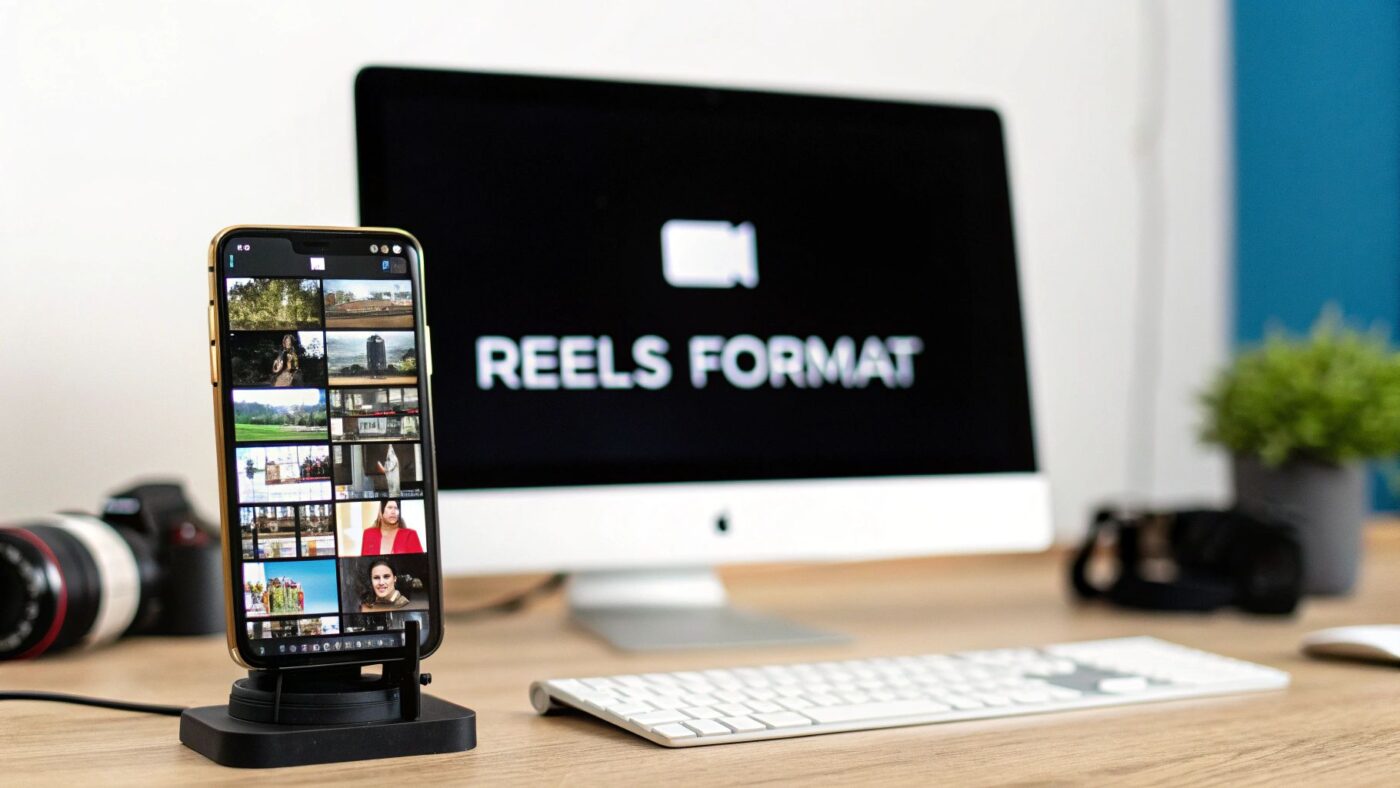
Your Essential Instagram Reels Format Cheat Sheet
Ever upload a Reel only to find it's blurry, pixelated, or oddly cropped? Mastering your export settings is the fix. Think of the Instagram Reels format as the blueprint for your video's success on the platform.
Getting these numbers right before you upload is the most critical step you can take. It ensures your audience sees your content exactly as you designed it, preserving its quality for that immersive, full-screen experience Reels are known for.
This visual guide breaks down the three most important specs for a perfect Reel.
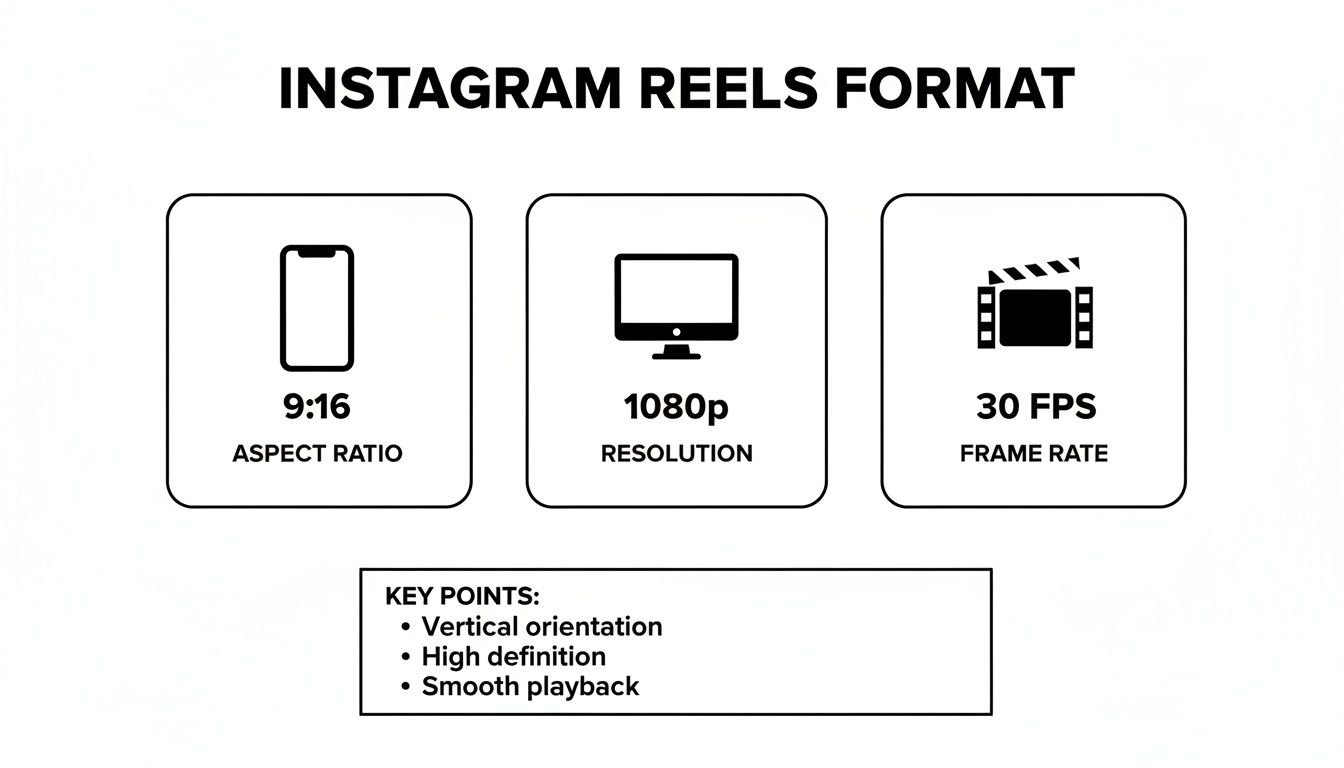
This graphic is a great quick reference for the non-negotiable trio of high-quality Reels: a full-screen 9:16 aspect ratio, a sharp 1080p resolution, and a fluid 30 FPS playback speed.
Key Technical Specifications
Beyond those core three, a few other settings play a vital role in how your Reels perform. Here’s a quick-reference table that covers all the bases for a flawless upload.
Instagram Reels Technical Specifications at a Glance
This table summarizes everything you need to know for the best possible export settings for your Reels. Keep it handy!
| Specification | Recommended Setting | Notes |
|---|---|---|
| Aspect Ratio | 9:16 | This is the standard vertical, full-screen format. |
| Resolution | 1080 x 1920 pixels | The sweet spot for quality without a massive file size. |
| Frame Rate (FPS) | 30 FPS | Instagram's standard. Mismatched frame rates can cause choppy playback. |
| File Type | MP4 | The most universally compatible format for the platform. |
| Video Codec | H.264 | Ensures excellent quality at a manageable file size. |
| Audio Codec | AAC | Standard for high-quality, compressed audio. |
| Max Length | 90 seconds | While you can go up to 90 seconds, shorter is often better for engagement. |
Sticking to these settings means your video will look exactly how you want it to, without any unexpected surprises after you hit "post."
While Instagram allows Reels up to 90 seconds long, remember that the algorithm often favors shorter, more engaging content. Platform data consistently shows that Reels under 60 seconds are more likely to be pushed to new audiences—a crucial factor if discovery is your goal.
Following these technical standards isn't just about avoiding upload errors. It's about signaling quality to both the algorithm and your viewers. A correctly formatted Reel looks more professional, holds attention longer, and ultimately performs better.
Of course, great technicals are only half the battle. Successful creators and small businesses combine high-quality video with compelling content strategies, an approach covered in these advertising ideas for small businesses: https://alisavepro.com/advertising-ideas-for-small-business/
To really elevate your content, it pays to understand the creative trends and platform nuances. Brushing up on popular Instagram Reels best practices can make a huge difference in your engagement and reach.
Getting Your Core Video Specs Right for Reels
Nailing your video settings is what separates a sharp, professional-looking Reel from one that gets scrolled past. Your core specs—aspect ratio, resolution, and frame rate—are the foundation of your video's quality. Get them wrong, and you’re looking at weird black bars, blurry footage, or choppy playback that instantly kills the vibe.
If you want your Reel to look immersive, crisp, and play smoothly on any phone, you have to start with the correct Instagram Reels format.
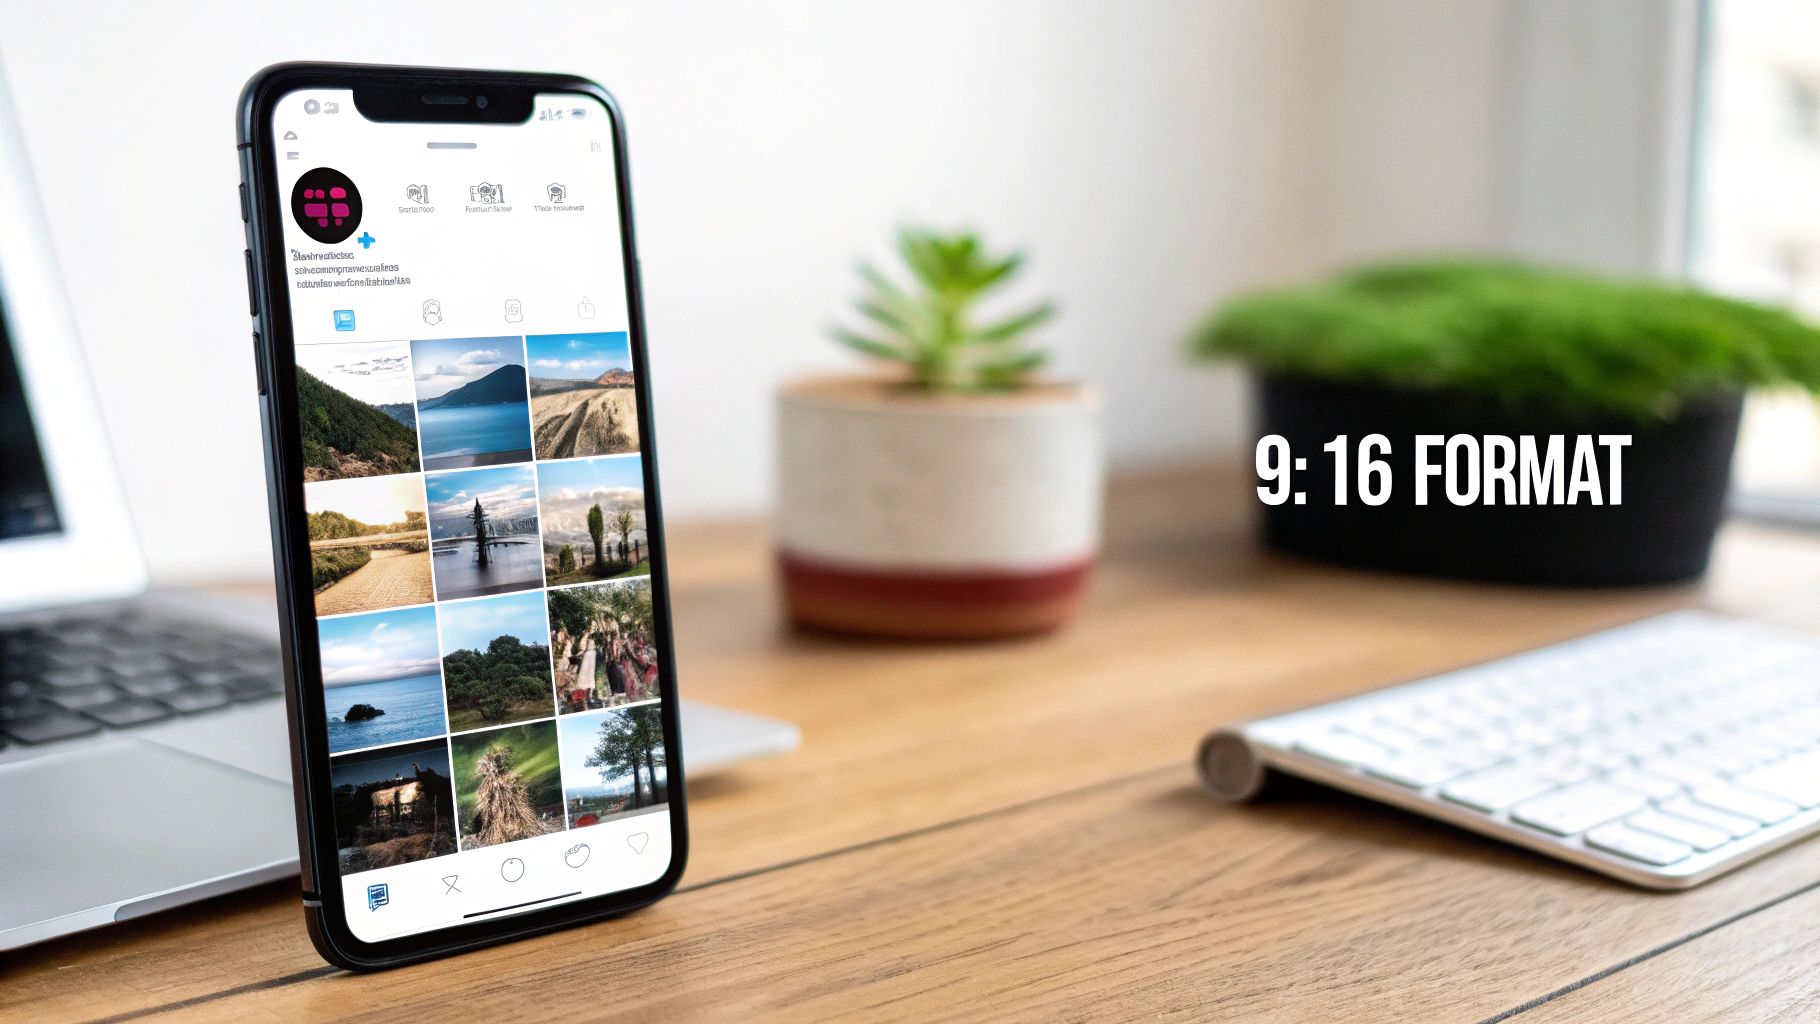
Why the 9:16 Aspect Ratio is a Must
Think of the 9:16 aspect ratio as the golden rule for Reels. It’s not just a suggestion; it’s essential. This vertical format is specifically designed to take over the entire mobile screen, pulling viewers in and cutting out distractions.
When you upload a video in a different shape, like a square (1:1) or a classic horizontal video (16:9), Instagram slaps black bars on the top and bottom to make it fit. It immediately screams "I wasn't made for this platform." A horizontal video, for example, shrinks into a tiny box, completely losing its power. Stick to 9:16, and your content will feel like it belongs. If you want to dive deeper into this, check out a comprehensive guide to vertical video dimensions.
The Sweet Spot: 1080×1920 Resolution
Resolution is all about clarity, and for Reels, the magic number is 1080 x 1920 pixels. This gives you a clean, high-definition look without making your file so huge it takes forever to upload.
Here’s what happens if you stray from that number:
- Uploading Below 1080p: If you go lower, say 720p, Instagram’s compression algorithm will chew it up, leaving it looking soft and pixelated.
- Uploading Above 1080p: You might think uploading in 4K is a pro move, but it often backfires. Instagram will aggressively compress that huge file down to its own standards, and the result can actually look worse than if you had just exported at 1080p in the first place.
By exporting at exactly 1080×1920, you’re handing Instagram a perfect file, which helps minimize any quality loss during the upload process.
Choosing the Right Frame Rate and Bitrate
Frame rate, or frames per second (FPS), dictates how smooth your video looks. For most Reels, 30 FPS is the perfect standard. It delivers that natural, fluid motion we're all used to seeing on our phones. If you’re planning on adding some slick slow-motion effects, shooting in 60 FPS will give you the extra frames you need to slow things down without it looking jerky.
Bitrate, on the other hand, is about how much data is packed into your video file. More data means better quality but a bigger file. For a 1080p Reel, aim for a video bitrate between 10-15 Mbps (megabits per second). This range keeps the details sharp without making the file a pain to upload. Of course, the technical specs are only one piece of the puzzle. Understanding social media strategy is just as vital, and if you're using Meta's platforms to grow, you might be wondering if advertising on Facebook works. We've got a guide that breaks it all down for you.
https://alisavepro.com/does-advertising-on-facebook-work/
Choosing the Right File Type and Codecs
Once you've nailed the dimensions and resolution, the next layer to master is the technical DNA of your video file. Getting this right is what separates a crisp, professional-looking Reel from a pixelated mess. Think of it this way: your file type is the shipping box, and the codec is how you expertly pack the contents to be both secure and compact.
Picking the right combo is a balancing act. You need a file that's small enough for a quick upload but still looks fantastic on a phone screen. Instagram is picky, so giving its algorithm exactly what it wants is the best way to avoid upload headaches and compression issues.
Why MP4 is the Universal Standard
When it comes to the file type, or "container," there’s really only one choice: MP4 (.mp4). It's the gold standard for a reason.
MP4 is universally supported, which guarantees your Reel will upload without a hitch and play back perfectly for everyone, no matter if they're using an iPhone, an Android, or a web browser. While you might get away with a .MOV file now and then, it’s a gamble that often leads to weird glitches or outright upload failures. Stick with MP4.
Video and Audio Codecs Explained
Inside that MP4 box, you have to pack your video and audio using the right compression method, known as a codec. The codec’s job is to shrink your media down to a manageable size while preserving as much quality as possible.
Recommended Codecs for Reels:
- Video Codec H.264: This is the undisputed champion for online video. H.264 provides a fantastic balance of high quality and small file size, which is exactly what you need to beat Instagram's aggressive compression.
- Audio Codec AAC: For your sound, Advanced Audio Coding (AAC) is the way to go. It keeps your music, voiceovers, and sound effects sounding clean and clear, even at lower bitrates.
Perfecting these technical details is more important than ever. With Reels now making up an estimated 35–38% of all time spent on Instagram, your content needs to be flawless to compete. If you want to dive deeper into this trend, you can discover more insights about Reels' growth on newswirejet.com.
Bottom line: The MP4 container with H.264 video and AAC audio is your foolproof formula for a technically perfect Reel. It’s what Instagram's servers expect and what gives you the best shot at a high-quality final product.
Getting Your Reels Cover Image Just Right for the Grid
Think of your Reel's cover image as its shop window. It's the first thing people see when they land on your profile grid, and a sharp, well-designed cover can easily be the difference between someone scrolling past or tapping to watch. It's a bit of a design puzzle, though. Your Reel is a full-screen 9:16 video, but its cover has to look good in two different formats at once.
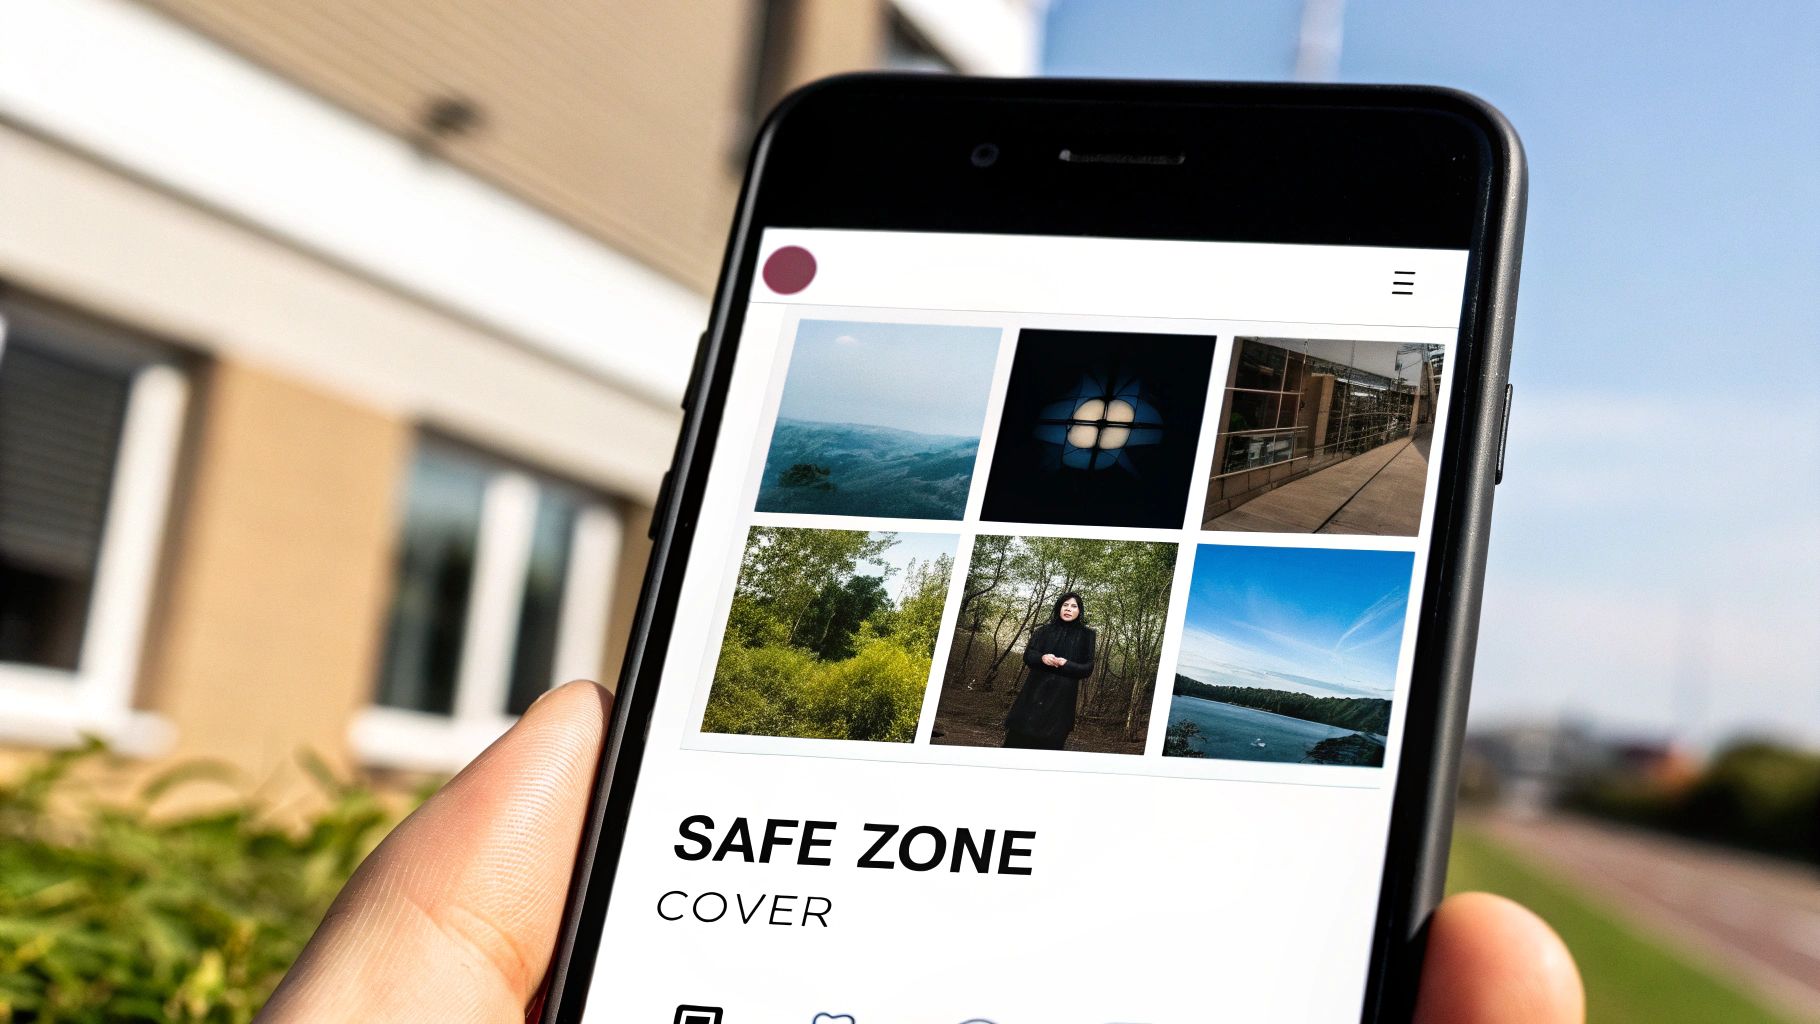
The secret is all about understanding the crop. Your cover image needs to be uploaded at the full Reel dimension of 1080 x 1920 pixels. But, when it shows up on your profile feed, Instagram crops it down to a 1:1 square (1080 x 1080 pixels), slicing off the top and bottom. Anything outside that central square will get chopped off and won't be visible on your grid.
Designing Within the "Safe Zone"
To sidestep that awkward crop that might cut off your face, your product, or your headline, you have to design within a "safe zone." This is simply the central square area where all your most important visual elements need to be placed.
Here’s a simple way to create a cover that works every time:
- Start with the Full Canvas: Set up your design file to be 1080×1920 pixels.
- Define Your Safe Zone: Keep all your key elements—like your logo, text, and the main subject—smack in the middle within that central 1080×1080 pixel square.
- Fill the Background: The top and bottom sections outside the safe zone still need to look good, but don't put anything critical there. Think of it as visual filler.
Following this ensures your cover looks fantastic both in the full-screen Reels feed and as a perfectly composed square on your main profile grid.
This screenshot shows exactly how Reels look in the dedicated tab versus on a profile grid.
See how the cover images are cropped into squares on the profile? That's why keeping your design centered in that "safe zone" is so important.
Custom Image vs. a Frame From Your Video
When choosing a cover, you've got two options: you can either pick a frame from your video or upload a completely custom image from your camera roll. Grabbing a frame is fast, no doubt. But for a business, uploading a custom image gives you total control.
A custom cover lets you add branded text, match your grid's aesthetic perfectly, and use a high-quality photo that really stands out. Honestly, for any brand or creator trying to build a professional-looking feed, a custom cover is pretty much always the way to go.
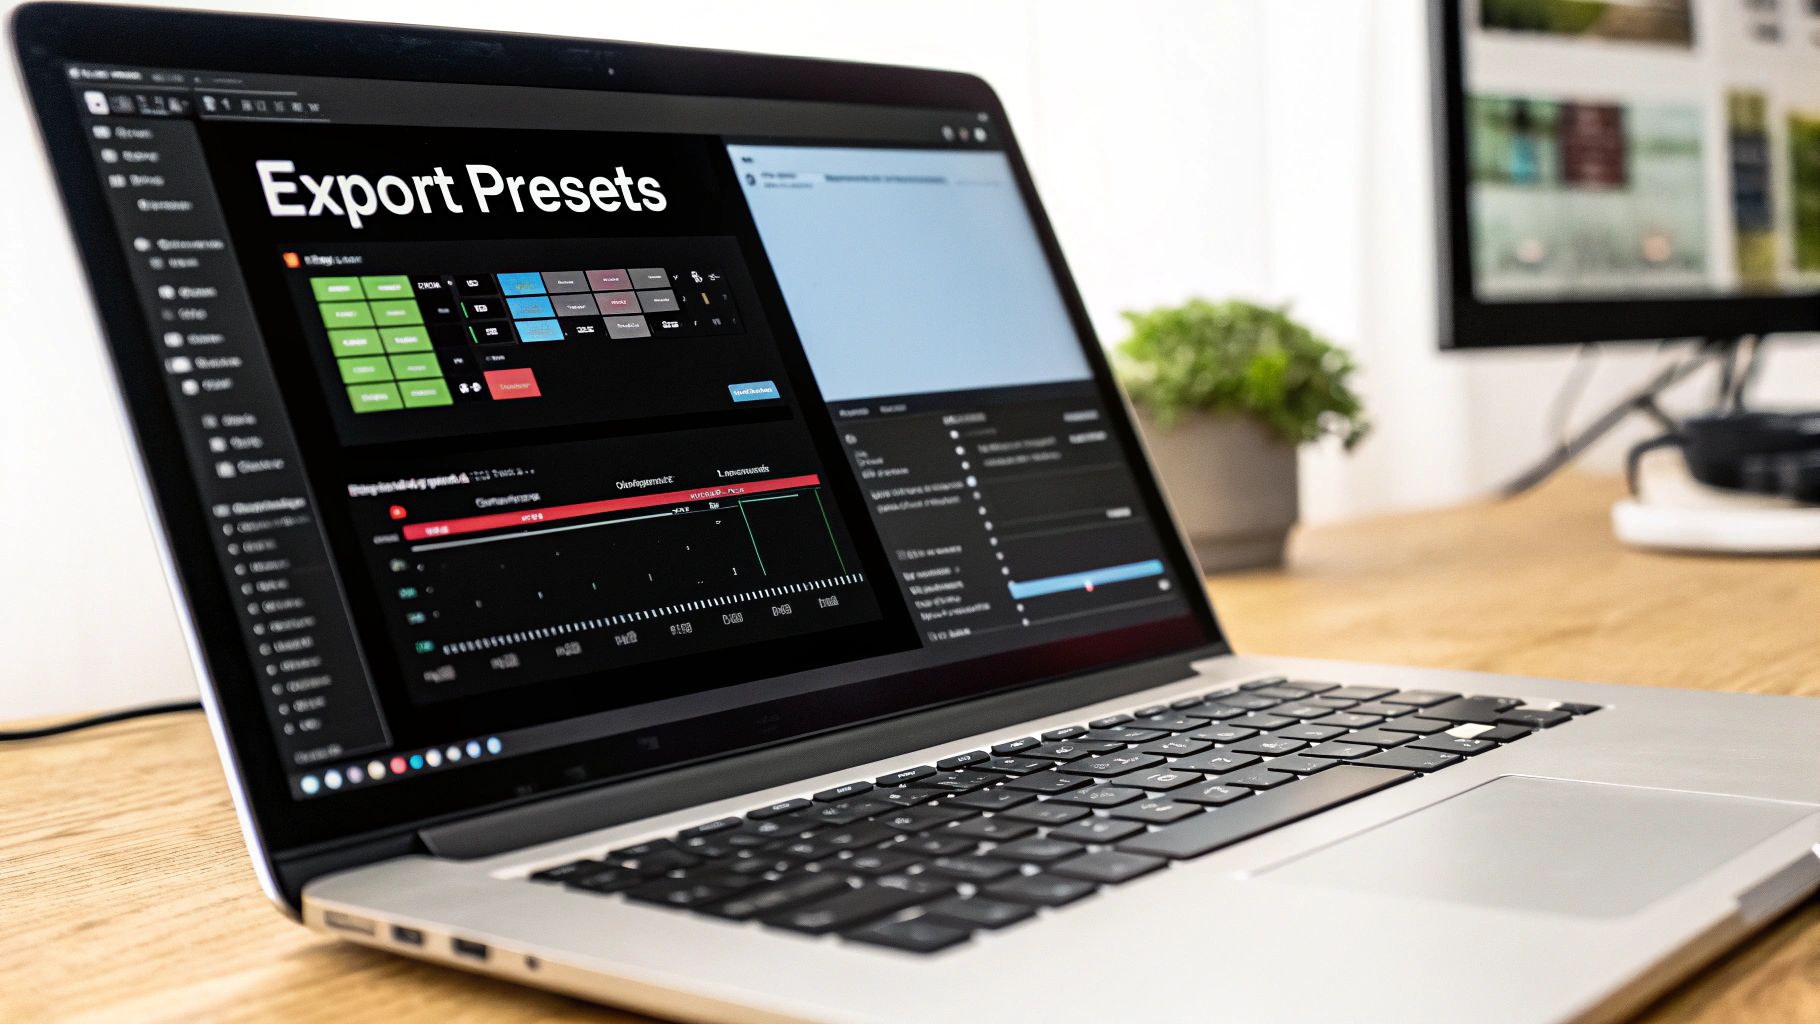
Quick Export Presets for Popular Video Editors
Okay, let's turn all that technical talk into action. Knowing the specs is one thing, but actually dialing them into your favorite video editor is where the magic happens. This section is your cheat sheet, giving you the exact, ready-to-use settings for the tools most e-commerce creators and social media pros are using every day.
Think of these as your go-to blueprints. They’re designed to save you the headache of trial and error, ensuring your video looks sharp, uploads without a hitch, and maintains its quality from your timeline to your audience's feed. Nailing the Instagram Reels format at the export stage is crucial.
Adobe Premiere Pro Settings
Adobe Premiere Pro gives you a ton of control, which is great but can also feel a bit overwhelming. If you want a flawless export that meets Instagram's exact needs, just follow this checklist.
This table breaks down the essential settings you'll need in the Export window.
| Setting | Value | Menu Location |
|---|---|---|
| Format | H.264 | Format dropdown menu |
| Frame Size | 1080 x 1920 | Video tab > Basic Video Settings |
| Frame Rate | 30 fps | Video tab > Basic Video Settings |
| Render at Max Depth | Checked | Video tab > Basic Video Settings |
| Bitrate Encoding | VBR, 1 pass | Video tab > Bitrate Settings |
| Target Bitrate | 12 Mbps | Video tab > Bitrate Settings |
| Audio Codec | AAC | Audio tab > Audio Format Settings |
| Sample Rate | 48000 Hz | Audio tab > Basic Audio Settings |
Once you've plugged these in, do yourself a favor: save them as a new preset. Just click the "Save Preset" icon next to the Preset dropdown and name it something obvious like "Instagram Reels." Now, for every future project, you can apply these perfect settings with a single click. It's a huge time-saver.
DaVinci Resolve Settings
DaVinci Resolve actually has a built-in "Instagram" preset, but I find you get better results by tweaking it slightly. Head over to the Deliver page and plug in these custom settings for the best quality.
- Format: QuickTime
- Codec: H.264
- Resolution: 1080 x 1920 HD
- Frame rate: 30
- Quality: Restrict to 12,000 Kb/s
- Audio Codec: AAC
Final Cut Pro and CapCut Settings
For those using Final Cut Pro or CapCut, the process is even simpler. Both of these editors are really well-optimized for social media content.
Final Cut Pro:
Go to File > Share > Master File. In the Settings tab, make these selections:
- Format: Computer
- Video Codec: H.264 Better Quality
- Resolution: 1920 x 1080 (Don't worry, FCP often lists the horizontal dimension first, but it will export a vertical 9:16 file if your project is set up that way).
CapCut (Desktop):
It doesn't get much easier than this. Click the Export button in the top right and set the following:
- Resolution: 1080p
- Codec: H.264
- Format: MP4
- Frame Rate: 30fps
Getting your export settings right isn't just a technicality—it directly impacts your content's performance. The data is clear: high-quality, properly formatted videos tend to get better engagement. While 2024-2025 benchmarks show average Reels engagement rates around 1.2%, top-tier creators who sweat these details often see numbers closer to 2.0%. You can read the full research about Reels engagement on adamconnell.me. Taking a minute to dial in your export process is one of the easiest ways to start closing that gap.
Troubleshooting Common Reels Upload Problems
Even when you’ve double-checked every single setting for the perfect Instagram Reels format, you can still run into frustrating upload errors that throw your whole content schedule off track. These issues often come with vague error messages, but from my experience, most of them boil down to just a few common technical glitches.
Figuring out the root cause is half the battle. For instance, that dreaded "Video Can't Be Posted" error or a video that mysteriously turns into a black screen after uploading usually points to a file configuration that Instagram's servers just don't like. Your video might play perfectly on your phone or computer, but if it was recorded with a variable frame rate (VFR) instead of a constant one (CFR), Instagram's processors can have a hard time making sense of it.
Common Issues and Their Solutions
Let's walk through the most common upload headaches and, more importantly, how to fix them. But before you dive into the more technical solutions, always start with the simple stuff: make sure you have a stable internet connection and that your Instagram app is updated to the latest version.
Issue: Black Screen or a "Video Can't Be Posted" Error
This is the number one problem I see, and it's almost always caused by a Variable Frame Rate (VFR). This is super common with screen recordings or footage from some smartphones.- The Fix: You need to re-encode the video to a Constant Frame Rate (CFR). An easy way to do this is with a free tool like HandBrake. You can also just re-export it from your video editor, but be absolutely sure the frame rate is locked at 30 FPS and not set to "variable."
Issue: My Reel Looks Blurry or Pixelated After Uploading
If your video looks crisp and clear before you upload but turns into a blurry mess on Instagram, the platform’s aggressive compression algorithm is to blame. This happens when your export settings aren't quite what it expects.- The Fix: Check that you’re exporting with the H.264 codec. Also, keep your bitrate in that sweet spot of 10-15 Mbps. Pushing the bitrate too high might seem like a good idea for quality, but it often forces Instagram to compress your file even more harshly.
Issue: The Audio Is Out of Sync With the Video
Ah, the classic audio drift problem. This is another issue that usually points directly to a frame rate mismatch. If the frame rate of your original footage doesn't align with your project's export settings, the audio can slowly drift out of sync as Instagram processes the file.- The Fix: Make sure your project timeline and your final export settings are both set to a consistent 30 FPS. If you're mixing clips with different frame rates in your edit, you need to conform them to your project's frame rate before you start editing to avoid any problems down the line.
Instagram Reels Format: Your Top Questions Answered
Even with all the specs laid out, you're bound to run into a few specific questions when creating Reels. Think of this section as your quick-reference troubleshooter for the most common hang-ups creators face. Let's get them sorted so you can get back to making great content.
What's the Absolute Maximum Length for a Reel?
Right now, the longest a single Instagram Reel can be is 90 seconds. Keep in mind, Instagram is always experimenting with these limits, so it’s something to keep an eye on.
But just because you can make a 90-second Reel doesn't always mean you should. We consistently see that Reels under 60 seconds tend to get more engagement and perform better in the algorithm. A smart timing strategy is just as important as your visual one, a principle that applies across platforms, as we discuss in our guide on the best times to post on Pinterest.
Why Does My Reel Look Blurry After I Upload It?
This is a classic problem, and it almost always comes down to one thing: Instagram's compression. When you upload a video, Instagram processes it to save server space. If your file isn't already optimized, this compression can wreck your video quality.
The main culprits are usually:
- Low Resolution: You exported your video at a resolution lower than the recommended 1080p.
- Wrong Codec: You used a format Instagram struggles with, instead of the standard H.264.
- Incorrect Bitrate: Your video's bitrate was set either too high or too low, forcing a messy re-compression.
The Quick Fix: To avoid the blur, always export your video at 1080x1920p and stick with the H.264 video codec. This hands Instagram a file that it barely needs to touch, which is the key to preserving that crisp, clean look you worked so hard on.
Can I Use a Different Aspect Ratio Besides 9:16?
Technically, yes, you can upload a 4:5 or 1:1 video. But you really shouldn't.
If you upload a video that isn't 9:16, Instagram will automatically slap black bars on the top and bottom to make it fit the vertical screen. This immediately makes your content look out of place and amateurish, breaking the seamless, full-screen experience that makes Reels so powerful. For a professional look that keeps viewers hooked, always shoot and export in the native 9:16 format.
Streamlining your content creation starts with efficient media gathering. With AliSave Pro, you can download high-resolution AliExpress product videos and images in a single click, perfectly preparing your assets for any social media format. Get the free Chrome extension and speed up your workflow today.