
Ever tried to send a massive folder of vacation photos to a friend? You probably zipped it up first. Image compression works on a similar principle: it’s the art of making digital image files smaller and more manageable.
For an e-commerce store, this isn't just a neat trick—it's essential for making your product pages load in the blink of an eye.
What Is Image Compression
At its heart, image compression is all about reducing the data in an image file. Picture a high-resolution photo as a giant, intricate mosaic made of millions of tiny colored tiles, or pixels. Compression algorithms are clever little techniques that figure out how to recreate that same mosaic using fewer tiles or by finding smart shortcuts to describe large areas of similar colors.
This process is absolutely critical if you're running an online store with hundreds, or even thousands, of product photos. The real challenge is hitting that sweet spot where the file is small enough to load instantly but the image still looks crisp and professional to a potential buyer.
The Impact on Your Online Store
So, why should you care so much about this? For an e-commerce business, the benefits are immediate and powerful.
- Faster Page Load Speed: This is the big one. Smaller images download much faster on a customer's phone or computer, directly speeding up your site.
- Improved User Experience: Nobody waits for a slow-loading product page. Fast, responsive images keep shoppers engaged and clicking, which means lower bounce rates.
- Better SEO Rankings: Search engines like Google reward sites that provide a great user experience, and speed is a huge part of that. Optimizing your images can give you a real boost in search rankings.
Let’s take a quick look at how these concepts translate directly into store performance.
Image Compression at a Glance
| Concept | What It Means for Your Store | Key Benefit |
|---|---|---|
| Reducing File Size | Making the data package for each image smaller without destroying its visual appeal. | Pages with many product photos load quickly, even on slower connections. |
| Data Efficiency | Using smart algorithms to remove redundant or unnecessary image information. | Less strain on your web hosting server and faster delivery to customers. |
| Quality vs. Speed | Finding the right balance between a crystal-clear image and a lightning-fast load time. | A professional-looking store that doesn't frustrate visitors with lag. |
In short, a smart compression strategy is a win-win, improving both customer satisfaction and your store's visibility.
The tech that makes this possible has a fascinating past. The groundwork for modern image compression was laid back in 1974 with the invention of the Discrete Cosine Transform (DCT), a mathematical process that later became the engine behind the JPEG format in 1992. That breakthrough changed everything about how we store and share photos online.
The primary purpose of image compression is to reduce the file size of an image to make it easier to store and transmit, without sacrificing too much of the visual quality.
Getting a handle on this concept is your first step. But to really see your store fly, you'll want to explore the whole process of how to optimize images for web. It’s a crucial skill for building a shop that's as fast as it is beautiful.
The Difference Between Lossy and Lossless Compression

When it comes to shrinking an image, you've got two main roads you can go down. These two approaches, lossless and lossy compression, are the fundamental techniques for cutting down file sizes. Figuring out the trade-offs between them is key to making choices that help your e-commerce store load fast and look great.
Each method tackles the problem differently. One plays it safe, keeping every single pixel exactly as it was. The other makes calculated sacrifices to achieve much smaller files. Your choice really depends on the type of image and what you need it to do on your website.
Lossless Compression: Perfect Quality Preservation
Think of lossless compression like packing a suitcase perfectly. You might use vacuum-seal bags to get everything to fit, but when you unpack, every single item is there, exactly as you packed it. Nothing is missing or damaged.
That’s precisely how lossless compression works. It finds clever ways to represent the image data more efficiently without throwing away a single bit of information. When you open the file, the image is reconstructed as a 100% perfect copy of the original.
This makes it the perfect choice for images where you absolutely cannot afford to lose any detail, like:
- Logos and Icons: These need to have sharp, clean lines and solid colors without any fuzziness.
- Technical Diagrams: Every line and number must be preserved for accuracy.
- Graphics with Text: Losing even a little data could make the text blurry and hard to read.
The most common file formats that use this method are PNG and GIF. They deliver flawless quality, but the file size savings are usually not as dramatic as the alternative.
Lossy Compression: Smart Sacrifices for Speed
Lossy compression takes a completely different route. It’s like a smart traveler who decides to leave behind a few non-essential items to make their luggage much, much lighter. This method permanently removes bits of data that the human eye isn't very good at noticing anyway.
This is an absolute game-changer for product photography. The JPEG algorithm, a classic lossy method, can shrink files by up to 10-20 times by discarding subtle details, yet the image still looks fantastic to us. For dropshippers using a tool like AliSave Pro, this means they can grab high-res product photos from AliExpress and compress them down to a fraction of their original size—turning a 5MB image into a sub-500KB file that still looks crisp and professional in an ad. If you're curious about the technical evolution, you can learn more about the history of image compression.
The key to lossy compression is finding that sweet spot. You want the smallest possible file size with the least noticeable drop in quality. When you get it right, your customers will never even know the difference.
This is why lossy compression is the standard for almost all photos on the web, especially in e-commerce, where you need beautiful product shots that don't slow down your site. Formats like JPEG and the newer, more efficient WebP are masters of this technique.
Lossless vs Lossy Compression: Choosing the Right Type
To make the right call, you need a clear picture of what each method offers. This table breaks down the core differences to help you decide which compression type is best suited for your e-commerce needs.
| Feature | Lossless Compression | Lossy Compression |
|---|---|---|
| Data Preservation | No data is lost. Original image can be perfectly restored. | Some data is permanently removed. |
| Image Quality | Identical to the original. 100% quality retention. | Very high, but not identical. Minor quality loss is possible. |
| File Size Reduction | Moderate (e.g., 20-30% reduction). | Significant (e.g., 50-90% reduction or more). |
| Best For | Logos, icons, technical drawings, graphics with text. | Photographs, detailed product images, complex graphics. |
| Common Formats | PNG, GIF, TIFF | JPEG, WebP, HEIC |
| Primary Goal | Preserve every detail with absolute precision. | Achieve the smallest file size with minimal visual impact. |
Ultimately, the choice isn't about which one is "better" overall, but which one is better for the specific image you're working with. For most e-commerce sellers, a combination of both is the winning strategy.
Picking the Right Image Format for Your Website
Okay, so we've covered the difference between lossy and lossless compression. The next logical step is figuring out which actual file type to use for your website's images. The format you choose has a direct impact on file size, how good the image looks, and how fast your page loads. Getting this right is a simple but incredibly effective way to make sure your store is both quick and beautiful.
Each format is built for a specific job. Think of them like tools in a toolbox—you wouldn't use a hammer to turn a screw, right? In the same way, picking the wrong image format can leave you with bloated files or fuzzy visuals, both of which slow down your site and frustrate visitors.
JPEG: The Go-To for Product Photos
There's a reason JPEG (or JPG) is the undisputed champion of the web. It uses lossy compression to strike a fantastic balance between high visual quality and impressively small file sizes, making it the perfect choice for complex images like product photos.
A JPEG can handle millions of colors, so it has no trouble capturing the subtle color shifts in a vibrant piece of clothing or the intricate details on an electronic gadget. When the format first appeared back in 1992, it was a game-changer. It allowed us to shrink photos into tiny files, which basically kicked off the online image revolution. Even with newer formats around, the original JPEG still handles over 90% of web traffic today. You can dive deeper into the fascinating history of the JPEG format if you're curious.
PNG: When You Need Transparency
When you need an image with a transparent background, PNG is your hero. It uses lossless compression, which means it keeps every single pixel exactly as it was, with zero loss in quality.
This makes it the ideal format for things like:
- Logos: You need your brand's logo to look sharp and clean against any background.
- Icons: Small graphical elements have to stay crisp and well-defined.
- Graphics with text: Any text laid over an image will remain perfectly clear and readable.
The trade-off? PNG files are almost always larger than JPEGs. You should really only use them when transparency or perfect, pixel-for-pixel detail is a must.
Use JPEG for your rich, colorful product photos to keep your pages loading fast. Switch to PNG only when you need that crystal-clear logo or an image with a transparent background.
WebP: The Modern, High-Performance Option
WebP is a newer image format created by Google specifically to deliver better compression on the web. It's a real powerhouse, supporting both lossy and lossless compression, and it can even handle transparency just like a PNG.
WebP's biggest advantage is its sheer efficiency. It can often create significantly smaller files than both JPEG and PNG while maintaining the same level of visual quality. It's no wonder major platforms like Shopify are embracing WebP to automatically serve smaller, faster-loading images to visitors. If your system supports it, switching to WebP is an excellent move to gain a performance edge.
How Image Compression Impacts Your SEO and Sales
It’s one thing to understand the nuts and bolts of image compression, but the real magic happens when you connect those technical details to your store's bottom line. Slow websites are absolute conversion killers, and more often than not, bulky, unoptimized images are the main culprits. This is where the simple act of shrinking a file transforms into a powerful business strategy.
Google’s ranking algorithms have a well-known dislike for slow-loading sites. Since images make up a huge chunk of a page's total weight, getting your compression right is non-negotiable for good SEO. But beyond just pleasing search engines, a faster site delivers a far better experience for the people who actually buy from you.
The High Cost of a Slow Website
Let's talk about the human element. Shoppers have zero patience. If a potential customer has to wait more than a couple of seconds for a product page to pop up, they’re gone—probably straight to a competitor with a zippier site. That's not just a lost visitor; it's a lost sale.
Every single second of delay in page load time can lead to a 7% drop in conversions. Think about that. For a store making $1,000 a day, a one-second delay could cost you $25,000 a year.
Suddenly, image compression stops being a minor technical tweak and becomes a critical piece of your sales funnel and overall best ecommerce website design.
Turning Speed into Sales
Optimizing your images creates a clear, direct path to better performance and more revenue. It sets off a positive domino effect that touches every important metric for your online business.
- Lower Bounce Rates: When pages load in a snap, visitors are much more likely to stick around and browse.
- Improved SEO Rankings: Google rewards speed. Faster sites climb higher in search results, bringing you more free, organic traffic.
- Higher Conversion Rates: A smooth, fast experience keeps customers happy and focused, guiding them effortlessly toward that "buy now" button.
Switching to modern formats like WebP can slash file sizes by 25-34% compared to old-school JPEGs. That's a huge deal, especially when you consider that images often eat up over 60% of a webpage's total bandwidth. If you want to dive deeper into why this matters, it's worth exploring why fast websites matter for NZ businesses to see the direct link between speed and commercial success.
Best Practices for Compressing Ecommerce Images
Knowing the what and why of image compression is great, but the real magic happens when you put it all into practice. Let's move from theory to action and walk through a repeatable process for getting every product photo on your store perfectly optimized.
Following these tips will do more than just make your images load faster; it helps them look fantastic and can even give your SEO a nice little bump.
This whole process is a chain reaction. You compress the image, the site loads faster, and happy customers are more likely to buy. It's a direct line from optimization to sales.
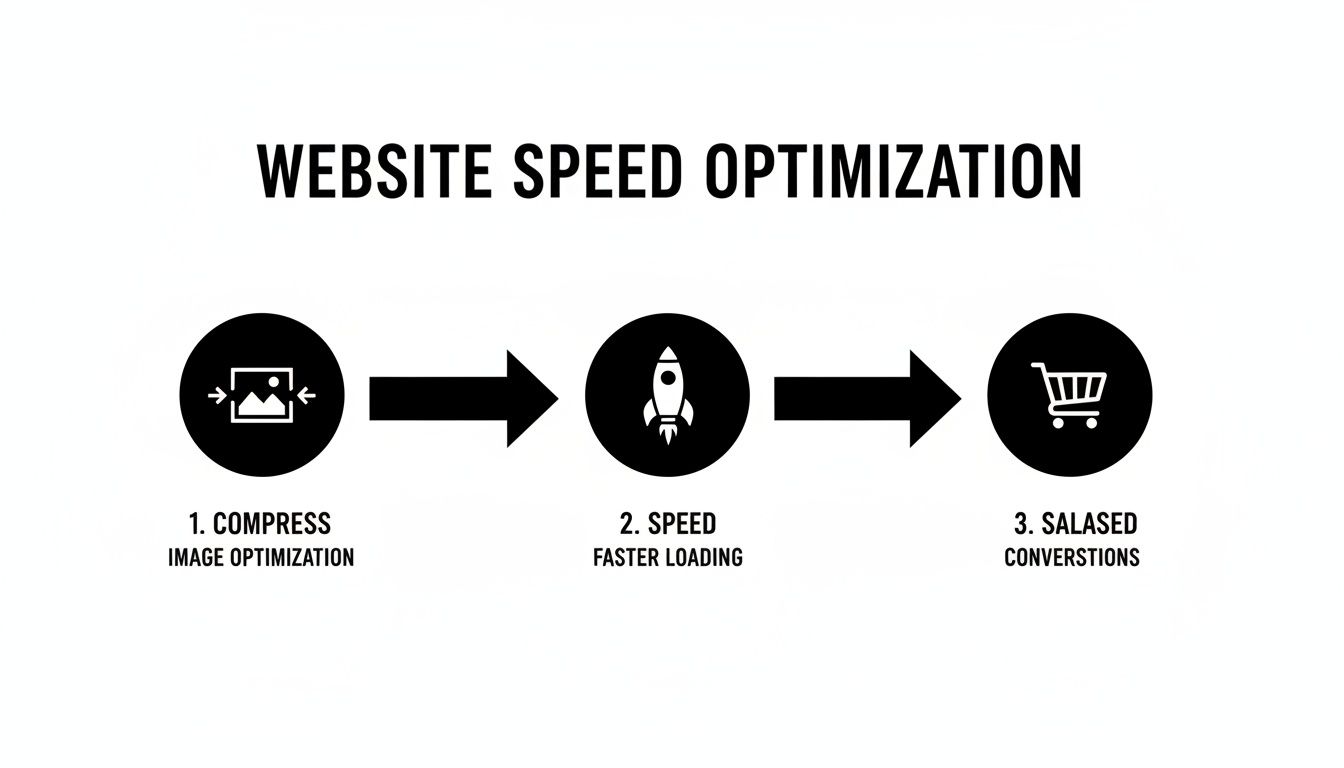
As you can see, it all starts with that first, critical step: compression.
Find Your Compression Sweet Spot
When it comes to JPEGs—which you'll be using for almost all of your product photos—aiming for 100% quality is a mistake. The real goal is finding that perfect balance where you've slashed the file size, but nobody can tell the difference just by looking at it.
For most e-commerce photos, a quality setting between 70% and 85% is the sweet spot. It delivers huge file size savings while keeping your product images looking crisp, vibrant, and totally professional.
You’ll want to play around within this range. An image of a simple t-shirt on a white background can probably handle a more aggressive compression, maybe closer to 70%. But a shot with intricate textures, like a detailed watch face, might need to stay closer to 85% to look its best. Always give the final image a quick look to make sure it holds up.
Resize Before You Compress
This is probably the biggest mistake I see store owners make. They upload a massive, high-resolution photo straight from their camera and just let the website shrink it down to fit. This forces your visitors to download a giant file, even if it's only being shown in a tiny thumbnail.
The right way to do it is a simple two-step process: resize, then compress.
- Find the Display Size: First, figure out the largest size the image will ever be shown on your site. A main product photo might be, say, 800 pixels wide.
- Resize the Image: Open the photo in an image editor and resize it to those exact dimensions before you do anything else.
- Apply Compression: Now, save the correctly sized image using your target compression setting (like 80% quality).
This simple habit ensures you're starting with the smallest possible dimensions, making your compression far more effective.
Name Your Image Files for SEO
Don't skip this last step! An image named IMG_7539.jpg is a completely missed opportunity. It tells search engines absolutely nothing about your product.
Instead, get into the habit of using descriptive, keyword-rich names. Think about what a customer would actually search for.
- Bad:
483920-a.jpg - Good:
blue-suede-running-shoes-front-view.jpg
This tiny change helps your products show up in Google Images, which can be a surprising source of free, organic traffic. When you combine smart file naming with good compression, you're building a faster, more discoverable store. And as we all know, site speed is a huge part of the customer experience—for more on that, see our guide on how to improve ecommerce conversion rates.
Tools and Workflows for Effortless Image Compression
Knowing about image compression is great, but who has the time to manually optimize every single product photo? It's a tedious process that can grind your productivity to a halt. The good news is that the right tools and a smart workflow can handle all the heavy lifting for you, saving you countless hours while keeping your site lightning-fast.
There are a ton of options out there, from simple online tools for quick fixes to more powerful, integrated solutions. If you just need to shrink one or two images, a web-based compressor is perfect. But for an e-commerce store with hundreds of products, you need a repeatable process—a seamless pipeline that takes you from sourcing a product to having it live on your site, fully optimized.
Choosing Your Compression Toolkit
The best tool for you really depends on your specific needs. The end goal, however, is always the same: make image compression a simple, almost invisible part of your routine.
- Online Compressors: Sites like TinyPNG or Google's Squoosh are fantastic for compressing a small batch of images. You just drag and drop your files, and they spit out an optimized version a few seconds later.
- Photo Editing Software: If you're already using programs like Adobe Photoshop or Affinity Photo, their "Save for Web" features give you incredible control over the final quality.
- Platform-Integrated Apps: Many e-commerce platforms like Shopify have apps in their ecosystem that automatically compress images as you upload them, so the whole process happens in the background.
A simple browser extension can be a game-changer right at the start of your workflow, making it easy to gather all the images you need.
A tool like this gets rid of that first big bottleneck by grabbing all the product media you need in one go.
Building a Seamless Workflow with AliSave Pro
If you’re dropshipping, your workflow starts the second you find a promising product on AliExpress. This is where a tool like AliSave Pro can completely change your process. It lets you download all the high-resolution product photos, variant images, and even videos with a single click, saving you from the mind-numbing task of saving each one by one.
The real magic is its optional built-in compression. You get to choose: download the original, untouched files, or get a ZIP file with every image already pre-compressed and ready to upload straight to your store.
This simple feature creates an incredibly efficient pipeline. You find a product, instantly grab all its media, and have it optimized before it even hits your e-commerce platform. It turns a multi-step, manual chore into a single, automated action.
If you're looking for more ways to speed up your site, our complete guide on how to optimize images for web is a great next step.
Got Questions? Let's Clear Things Up
Even after you get the hang of image compression, a few practical questions always pop up. Let's walk through some of the most common concerns we hear from e-commerce sellers so you can optimize your store's images with confidence.
Will Compressing My Images Make Them Look Blurry?
Not if you do it right! This is probably the number one fear, but modern compression tools are incredibly smart. For a standard JPEG photo, sticking to a quality setting between 70-85% works wonders. It shrinks the file size dramatically, but the change in quality is so small you'd be hard-pressed to spot it.
The whole game is about finding that sweet spot—the point where the file is as small as possible without your customers noticing any difference in sharpness.
For things like logos or graphics with sharp lines, that's where lossless formats like PNG come in. They guarantee zero quality loss, so every pixel stays exactly where it should be.
It's all a balancing act. If you push the compression too far, you'll definitely see blurriness. But with the right setting, you get a speedy website without compromising that professional look your product photos need.
What’s the Best Image Format for My Product Pages?
Picking the right format from the get-go is half the battle. Here’s a quick breakdown of your main options:
- JPEG: This is your workhorse. For just about any product photograph, JPEG is the way to go. It’s built to handle complex images with millions of colors and offers fantastic compression.
- PNG: Save this one for images that need a transparent background. Think logos, icons, or specific graphic overlays on your site.
- WebP: This is the new kid on the block, and it's a powerhouse. If your e-commerce platform supports it, WebP can often compress images even better than JPEG and PNG, giving you an extra speed boost.
What Size Should My Images Be Before I Compress Them?
This is a critical point that people often miss. It’s a simple two-step process: resize first, then compress.
Before you even think about compression, figure out the largest size the image will be displayed at on your website. For instance, if your main product photo container is 800 pixels wide, uploading a massive 3000-pixel image is just wasting bandwidth.
Crop and resize the image to its final display dimensions first. Then apply compression. This workflow ensures your visitors aren't downloading huge, unnecessary files, which is a massive win for page speed.
Does AliSave Pro Automatically Compress My Images?
We built in flexibility because we know every store owner has a different workflow. With AliSave Pro, the choice is yours. You can download the original, full-resolution images and videos straight from AliExpress if you need maximum quality for editing.
Alternatively, you can flip on the optional compression feature.
When it's enabled, AliSave Pro automatically shrinks the file sizes as it downloads them. This gets your media ready for a quick upload to your store, cutting out an extra step and saving you a ton of time.
Ready to streamline your entire process, from sourcing product media to getting it live on your site? AliSave Pro lets you grab all AliExpress product photos, variant images, and videos in just one click—with smart compression built right in. Get started for free and see how many hours you can save.