

Before you can start tagging products and making sales, there are a few foundational pieces you need to get right. Think of this as the prep work—getting it sorted now saves you from headaches and potential rejections down the road. It's the difference between a smooth launch and a frustrating dead end.
Over 25 million businesses are already using Instagram's shopping features for a good reason. With 90% of Instagram accounts following at least one business, the appetite for commercial content is already there. You just need to build the bridge.
Your First Essential Move
First things first, your standard personal profile won't cut it. You absolutely must convert your account to a Professional Account, which can be either a Business or Creator profile. This is the master key that unlocks all the e-commerce tools, from product tagging to the analytics you'll need to see what's working.
Once that’s done, you need to link your professional Instagram account to a Facebook Page. Instagram Shopping is built on Meta's larger commerce platform, so this connection is non-negotiable. It's how your product catalog is managed and how your business gets verified. Make sure you're an admin on the Facebook Page to avoid any permission hiccups.
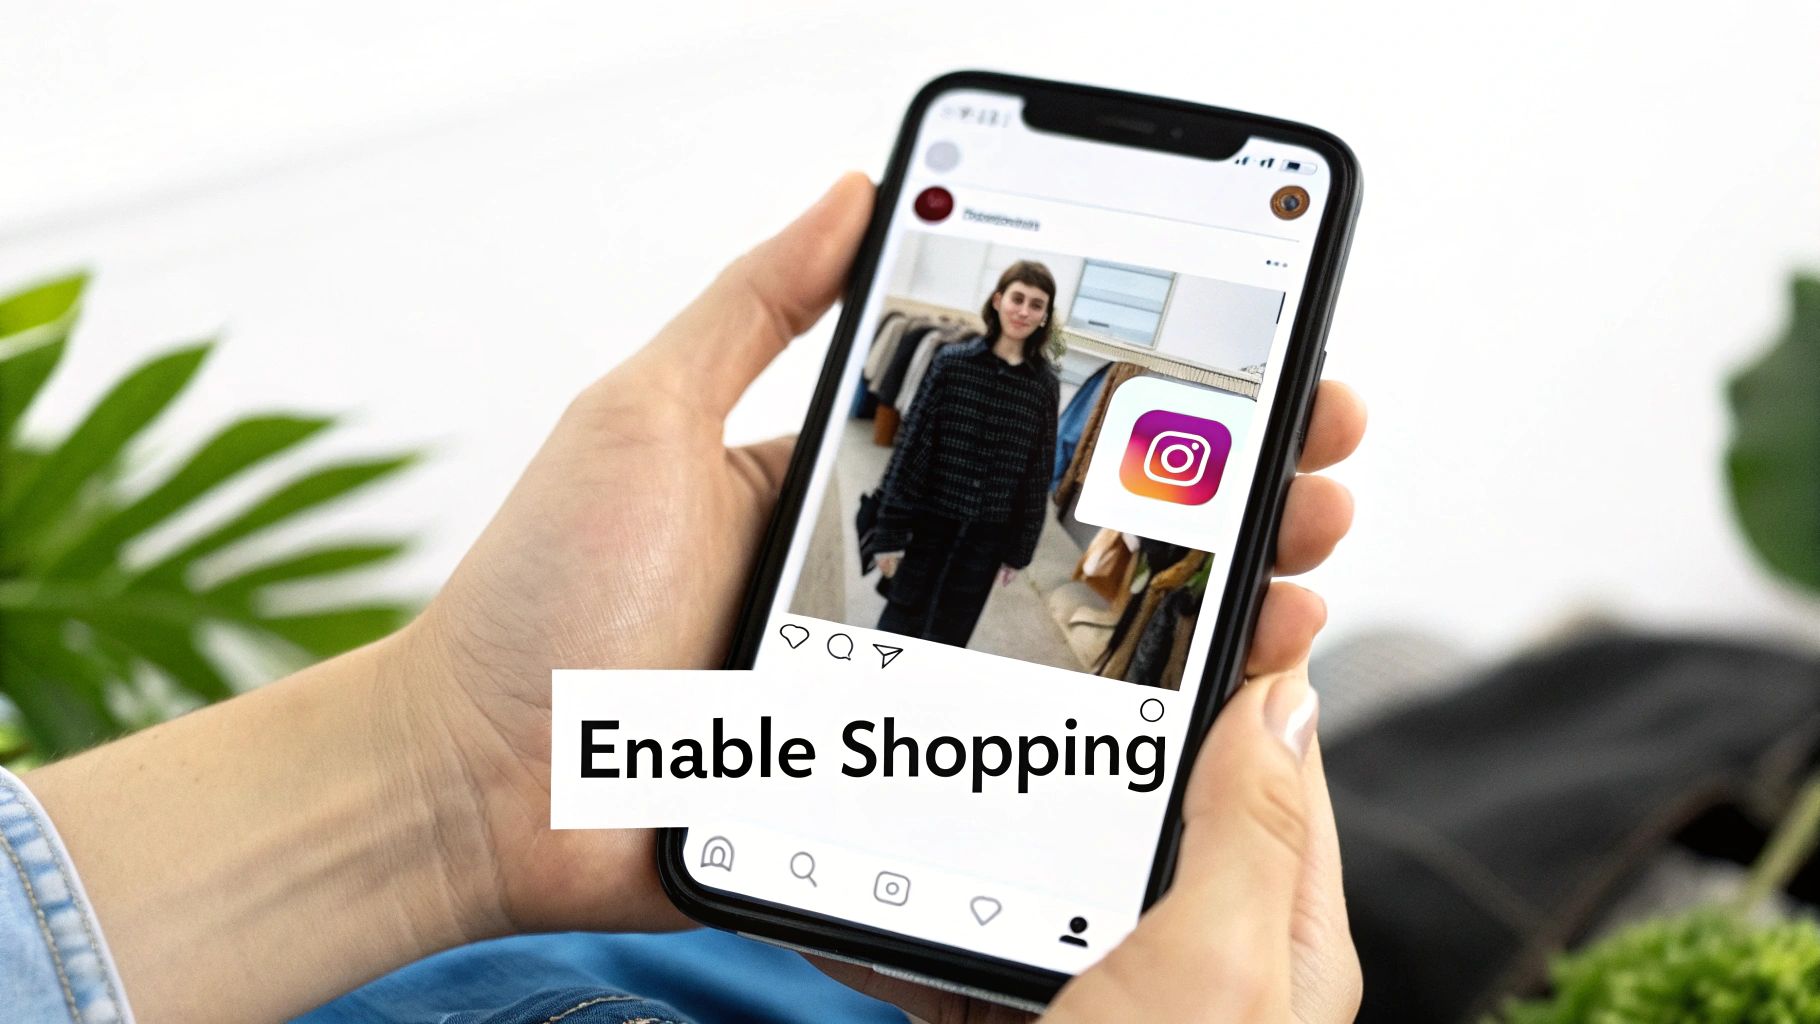
The image above shows just how slick the integration is. A regular-looking post becomes a direct sales opportunity. This seamless experience is exactly why getting the backend setup correct from the very start is so crucial.
Understanding the Rules of Engagement
Finally, don't skip the fine print. Take a few minutes to read through Instagram's Commerce Policies. Not everything can be sold on the platform. The rules generally favor physical goods, and you have to be operating in a supported country. A quick check now ensures your products are compliant and saves you from a disappointing rejection notice later.
Key Takeaway: A successful Instagram Shop launch is built on three pillars: a Professional Account, a linked Facebook Page, and products that meet Instagram's commerce rules. Get these right, and you're ready to build.
Before diving into the setup, a quick review can ensure you're ready to go.
Instagram Shop Eligibility Checklist
This table is your quick-start guide to confirming you have everything in place before you begin.
| Requirement | Why It's Important | How to Check |
|---|---|---|
| Professional Account | Unlocks access to Commerce Manager, product tagging, and analytics. | Go to Settings > Account > Switch to Professional Account. |
| Linked Facebook Page | Required for catalog management and business verification within Meta's ecosystem. | In your Instagram profile settings, go to Edit Profile > Page. |
| Supported Country | Instagram Shopping is not available globally; your business must be located in an eligible region. | Check Meta's official list of supported markets. |
| Commerce Policy Compliance | Ensures your products are eligible for sale and prevents your shop from being rejected. | Review the official Commerce Policies on Meta's website. |
Nailing these foundational steps is the most critical part of the process. If you’re looking for a complete walkthrough, this guide on how to set up your Instagram shop is another great resource to keep handy.
Building Your Digital Storefront in Commerce Manager
Alright, now that you’ve got your accounts sorted, it's time for the fun part: actually building your shop. This all happens inside Meta's Commerce Manager, which is basically the mission control for everything you sell on Instagram and Facebook. Think of it as the back office for your new digital storefront.
Your first big move in Commerce Manager is to create a new commerce account. This will walk you through linking up all your business assets and, most importantly, deciding how your customers will check out. This is a critical decision that really shapes the entire buying journey for your followers.
Choosing Your Checkout Path
You've got a couple of main ways to handle payments, and the right choice really boils down to your business setup.
- Checkout on Another Website: This is the go-to for most people. When a customer is ready to buy, they get sent from Instagram directly to the product page on your own e-commerce site (like your Shopify or WooCommerce store). It's a great way to keep all your sales data in one place on your main platform.
- Checkout on Instagram: If you're a U.S.-based business, you can use this option to let customers buy products without ever leaving the app. It's incredibly smooth and can do wonders for reducing abandoned carts. Just be aware that Meta takes a small transaction fee for the convenience.
After you've picked your checkout method, the next step is to build the core of your shop—your product catalog. This is the digital inventory of every single thing you want to sell.
This diagram gives you a bird's-eye view of the whole setup process.
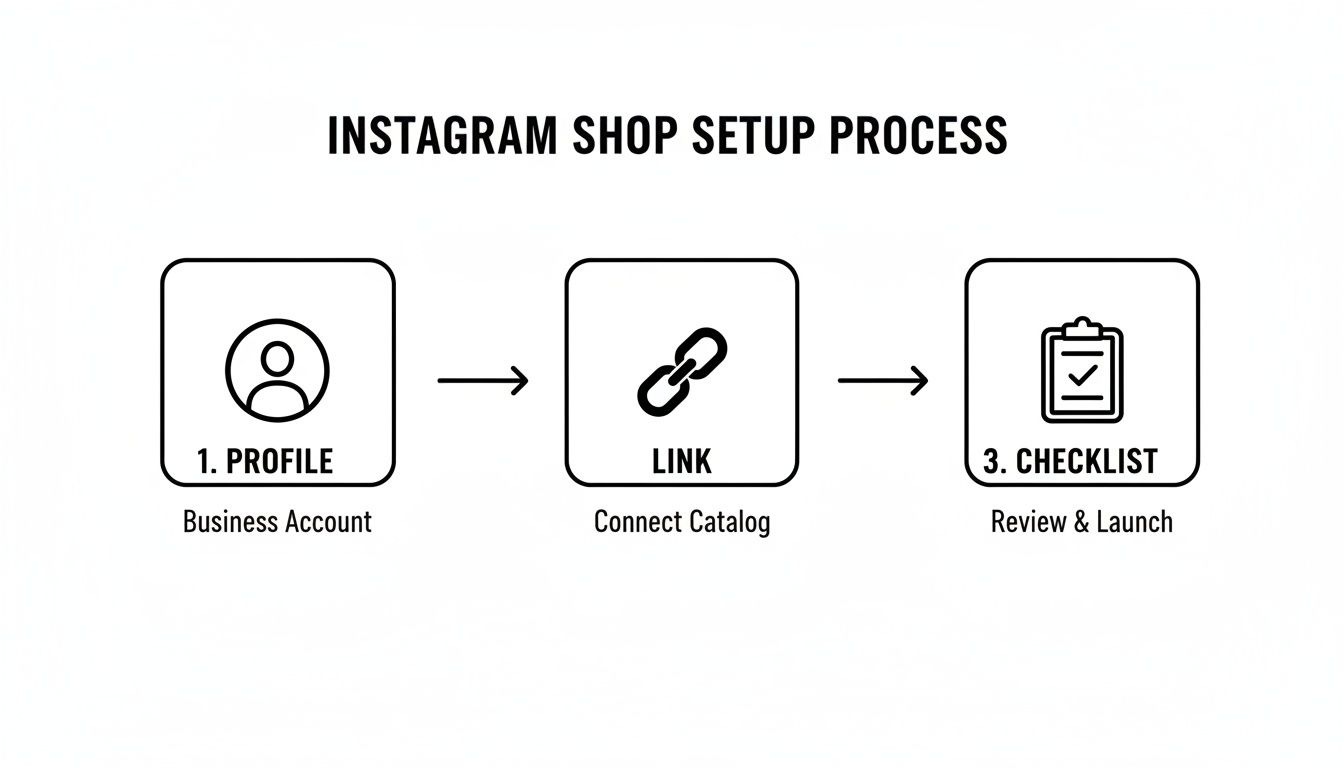
As you can see, it really comes down to having a solid profile, a perfectly synced catalog, and passing that final review before you go live.
Populating Your Product Catalog
Commerce Manager offers three different ways to get your products loaded in. The best method for you really depends on how many products you have and what tech you're already using.
A quick word of advice: Your product catalog isn't just a list. It's the engine that runs every shoppable post, story, and ad you create. Keeping it accurate and up-to-date isn't just a good idea—it's essential for keeping your customers happy.
Here are your options:
Manual Upload: This is the most direct route and works well if you have a small, manageable inventory—think under 50 items. You’ll add each product individually, uploading images, writing descriptions, setting prices, and linking back to your website. It’s simple, but it can be time-consuming.
Partner Platform Integration: Honestly, this is the best and most efficient method for most sellers. If you're already using an e-commerce platform like Shopify, BigCommerce, or WooCommerce, you can sync your entire product catalog directly. This is a lifesaver because it automatically updates your Instagram Shop whenever you add new products, change a price, or sell out of an item on your main website.
Data Feed File: This is more of a power-user option. If you have a massive, complex inventory and maybe a custom-built website, you can use a data feed. This means creating a formatted spreadsheet (like a Google Sheet or CSV file) with all your product info and scheduling regular uploads to keep your catalog synced.
Picking the right catalog method from the get-go will save you a ton of headaches and manual work down the line. It's worth spending a few extra minutes here to get it right.
Activating Shopping and Tagging Your Products
With your product catalog connected and raring to go, you're on the home stretch. The last big hurdle is a quick review by Instagram's team. They're essentially doing a final check to make sure your account, products, and website all line up with their Commerce Policies.
This part is usually pretty painless and often only takes a few days. The biggest hold-ups I've seen are simple mistakes, like not having clear contact info on your profile or having broken links on your website. Just give everything a once-over before you submit to make sure it's all in good shape.
Flipping the Switch on Instagram Shopping
Once you get that sweet approval notification, it's time to make it official. This is the fun part where you actually turn on the shopping features and bring your digital storefront to life.
Head over to your professional dashboard to get started:
- From your profile, tap Settings and privacy.
- Go to Business tools and controls (or Creator tools, depending on your account type).
- Find and select Set Up Instagram Shopping.
Just follow the prompts from there. You'll link up the product catalog you already built, and once it's confirmed, a brand-new Shop tab will magically appear on your Instagram profile. Now your followers can browse your entire collection without ever leaving the app.
This isn't just a technicality; it's your entry pass into a massive shopping ecosystem. Over 25 million businesses have Instagram Shops, and users are tapping on shopping tags 130 million times every single month. After a typical 24-48 hour approval, you gain access to a platform where 200 million people tap on shopping posts every day. The potential is enormous.
Turning Your Content Into a Sales Engine
Okay, shopping is enabled. Now what? It's time to turn your content—every post, Story, and Reel—into a direct path to purchase. This is where you really start to see the power of an Instagram Shop.
Product tagging isn't just for your main feed anymore. You can make almost every piece of content shoppable:
- Feed Posts: When you're creating a new post, you'll see the option to Tag Products. You can tag up to five items per image or video. I always recommend placing the tag directly on the product so it’s super obvious what the user is looking at.
- Stories: Look for the "Product" sticker in your sticker tray. This lets you highlight a specific item from your catalog. It’s perfect for new arrivals or "product of the day" features.
- Reels: Just like with feed posts, you can tag products in your Reels. This is a game-changer for capitalizing on trending audio and viral formats. The tag shows up as a neat little banner at the bottom of the Reel.
Pro-Tip: Don't just slap tags on anything. Be strategic. If you're a fashion brand, tag the specific handbag your model is holding in a lifestyle shot. If you sell home goods, tag the exact vase on the shelf in a room tour Reel. Context is everything; it makes the tag feel helpful, not pushy.
Strategies to Optimize Your Shop for More Sales

Getting your Instagram Shop approved is a huge first step, but it’s really just the starting line. Now the fun part begins: turning your profile into a place that doesn't just show off your products but actually sells them. The goal is to build an irresistible shopping experience right inside the app.
The absolute foundation of a successful shop is fantastic product media. On a platform as visual as Instagram, blurry, poorly lit, or just plain boring photos and videos will get scrolled past in a heartbeat. You have to stop that scroll.
Crafting Scroll-Stopping Product Media
On Instagram, looks are everything. You have less than a second to make an impression, so your visuals need to do the heavy lifting. High-quality images and videos build trust and make your products feel more premium and desirable.
Here's how to level up your product media:
- Show, Don't Just Tell: Ditch the endless stream of static, white-background shots. Instead, showcase your products being used in real life. If you sell a coffee mug, show someone curled up on a cozy morning enjoying their first cup. Context is everything.
- Embrace Video Content: Reels and video posts are engagement gold. A quick video showing off a product's best features or a cool behind-the-scenes look at how it’s made can be incredibly powerful. To make sure your content really shines, get the specs right by following the latest Instagram Reels format.
- Leverage User-Generated Content (UGC): Nothing builds trust faster than seeing real people loving your products. When customers tag you in their posts, ask for permission to feature their content. This kind of social proof is often more persuasive than any polished ad you could run.
One study that pitted user-generated content against professional brand photography found that the authentic, user-created posts saw a 20% higher conversion rate. It’s proof that sometimes, real-world appeal beats polished perfection.
Organize for an Effortless Shopping Journey
Once your stunning visuals have grabbed their attention, you need to make it incredibly easy for people to browse and buy. A messy, disorganized shop is like a cluttered store—it's overwhelming and makes customers want to leave.
This is where Collections become your best friend. Think of them as curated shelves in your digital storefront, like "New Arrivals," "Best Sellers," or "Gifts Under $50." They guide your customers and help them discover more of what they might love.
You can set these up right inside Commerce Manager by grouping products manually or creating rules based on things like price or category. This simple step can dramatically improve the shopping experience and keep people exploring your catalog longer. For an extra boost, integrating some viral video marketing strategies for shopping can drive even more qualified traffic directly to these organized collections.
Advanced Tactics for Driving Conversions
Ready to move beyond the basics? Once you know how to create a shop on Instagram, the next step is using its more advanced features to create excitement and drive direct sales.
- Host Live Shopping Events: Instagram Live Shopping lets you connect with your audience in real-time. You can demo products, answer questions on the spot, and build a genuine community vibe. Pinning products during the broadcast makes it seamless for viewers to purchase right then and there.
- Customize Your Product Detail Pages (PDPs): Don't settle for the default layout. Head into Commerce Manager and beef up your PDPs with rich, detailed descriptions, sizing guides, and multiple high-resolution photos and videos. The more info a customer has, the more confident they'll feel buying.
- Collaborate with Influencers: Partnering with creators who genuinely fit your brand's vibe can put your products in front of a whole new audience. You can give them permission to tag your products directly in their content, turning their posts into authentic, shoppable recommendations that drive real sales.
Keeping Your Shop on Track and Fixing What's Broken
Getting your shop live is a huge step, but the real work has just begun. To actually grow and make sales, you need to get into the weeds and figure out what’s working with your audience and what’s falling flat. This is where your shop's performance data becomes your best friend.
Think of Meta’s Commerce Manager as your command center for analytics. It gives you a behind-the-scenes look at how people are interacting with your products. You can track everything from product page views, which tells you what's catching their eye, to the hard sales data that points out your bestsellers. These numbers are gold—they help you make much smarter choices about your content, promotions, and even what you keep in stock.
Remember, Instagram Shopping is all about making it easy for people to discover and buy. With 81% of users hopping on the platform just to research products, your analytics are a direct line into their shopping habits. And when you realize that 44% of those users are shopping weekly, you start to see just how valuable every little data point can be. If you're curious, you can dive deeper into these Instagram shopping statistics and see the massive potential for yourself.
Navigating Common Hurdles
Even with a flawless setup, you're bound to hit a few speed bumps. Knowing how to handle the usual suspects will keep your shop humming along and save you from losing out on sales. So, if something goes wrong, don't sweat it—most problems have a pretty simple fix.
Here are a few of the most common issues you might run into:
- My shop got rejected! This is usually a simple policy issue. The most common culprit is a mismatch with Instagram's Commerce Policies. Go back and carefully review them, making sure your products are actually eligible and that your website domain has been properly verified.
- I can't tag a specific product. If an item just won’t show up when you try to tag it, it's almost always a catalog sync problem. Pop over to your Commerce Manager and manually refresh your data feed. While you're there, check that specific product's listing for any errors.
- My whole catalog is out of sync. Using a platform like Shopify or WooCommerce? Sometimes the connection just breaks. The quickest fix is usually to re-authenticate the link between your e-commerce store and your Commerce Manager.
Key Insight: A lot of shop owners I talk to see tons of product views but not enough sales. This is a classic sign that your product page needs work. Crystal-clear images, compelling descriptions, and upfront pricing aren't just nice to have—they're essential for turning a casual looker into a buyer.
By keeping a close eye on your analytics, you’ll start to see patterns emerge. You'll know which products get the most love and which ones are duds. This data can also give you powerful clues about why people might be hesitating to buy, which is exactly what you need to know if you want to reduce shopping cart abandonment and tighten up your entire sales process.
Got Questions? Let's Talk About Instagram Shops
Even with a detailed guide, a few questions always seem to pop up. Setting up a shop on Instagram has a lot of moving parts, so let's clear up some of the most common things people ask. My goal here is to help you get past any sticking points and move forward with confidence.
How Much Does It Actually Cost to Set Up an Instagram Shop?
Here's the great news: setting up your shop is completely free. You won’t pay a dime to Instagram for creating the shop itself, uploading your product catalog, or tagging products in your posts and Stories. It’s an incredibly powerful way to reach a huge audience without any upfront investment.
The only time you'll see a fee from Meta is if you’re in the U.S. and use the Instagram Checkout feature, which lets customers buy right in the app. For those sales, there's a small selling fee to cover the transaction. If you send shoppers to your own website to complete their purchase, you'll just have your usual payment processing fees from platforms like Shopify or Stripe.
Can I Sell Services or Digital Products on Instagram?
This is a big one, and unfortunately, the answer is mostly no. Right now, Instagram's Commerce Policies are built almost entirely around selling physical, tangible goods.
That means things like services, digital downloads, online courses, and subscriptions are generally not supported. While I've seen Meta test out pilot programs for digital creators in a few places, you should work under the assumption that only physical products are allowed. Always give the official Commerce Policies a quick read before you start building your catalog just to be safe.
Help! My Instagram Shop Was Disapproved. What Do I Do Now?
Seeing that "disapproved" notice can be a real gut punch, but it's usually not the end of the road. Don't panic. The first thing to do is head straight over to your Commerce Manager. Meta is pretty good about listing the specific reason for the rejection right there.
Most of the time, disapprovals are for simple things. It could be a minor policy violation you overlooked, your website domain not being verified, or some missing business info on your profile. Just read what they tell you, fix the issue, and you can request another review right from the dashboard.
Ready to get some amazing photos and videos for your new Instagram Shop? The easiest tool I've found for this is AliSave Pro. It lets you download high-quality AliExpress product images, videos, and even customer reviews in a single click. It's a massive time-saver for creating content that stops the scroll. You can get started for free over at the AliSave Pro website.